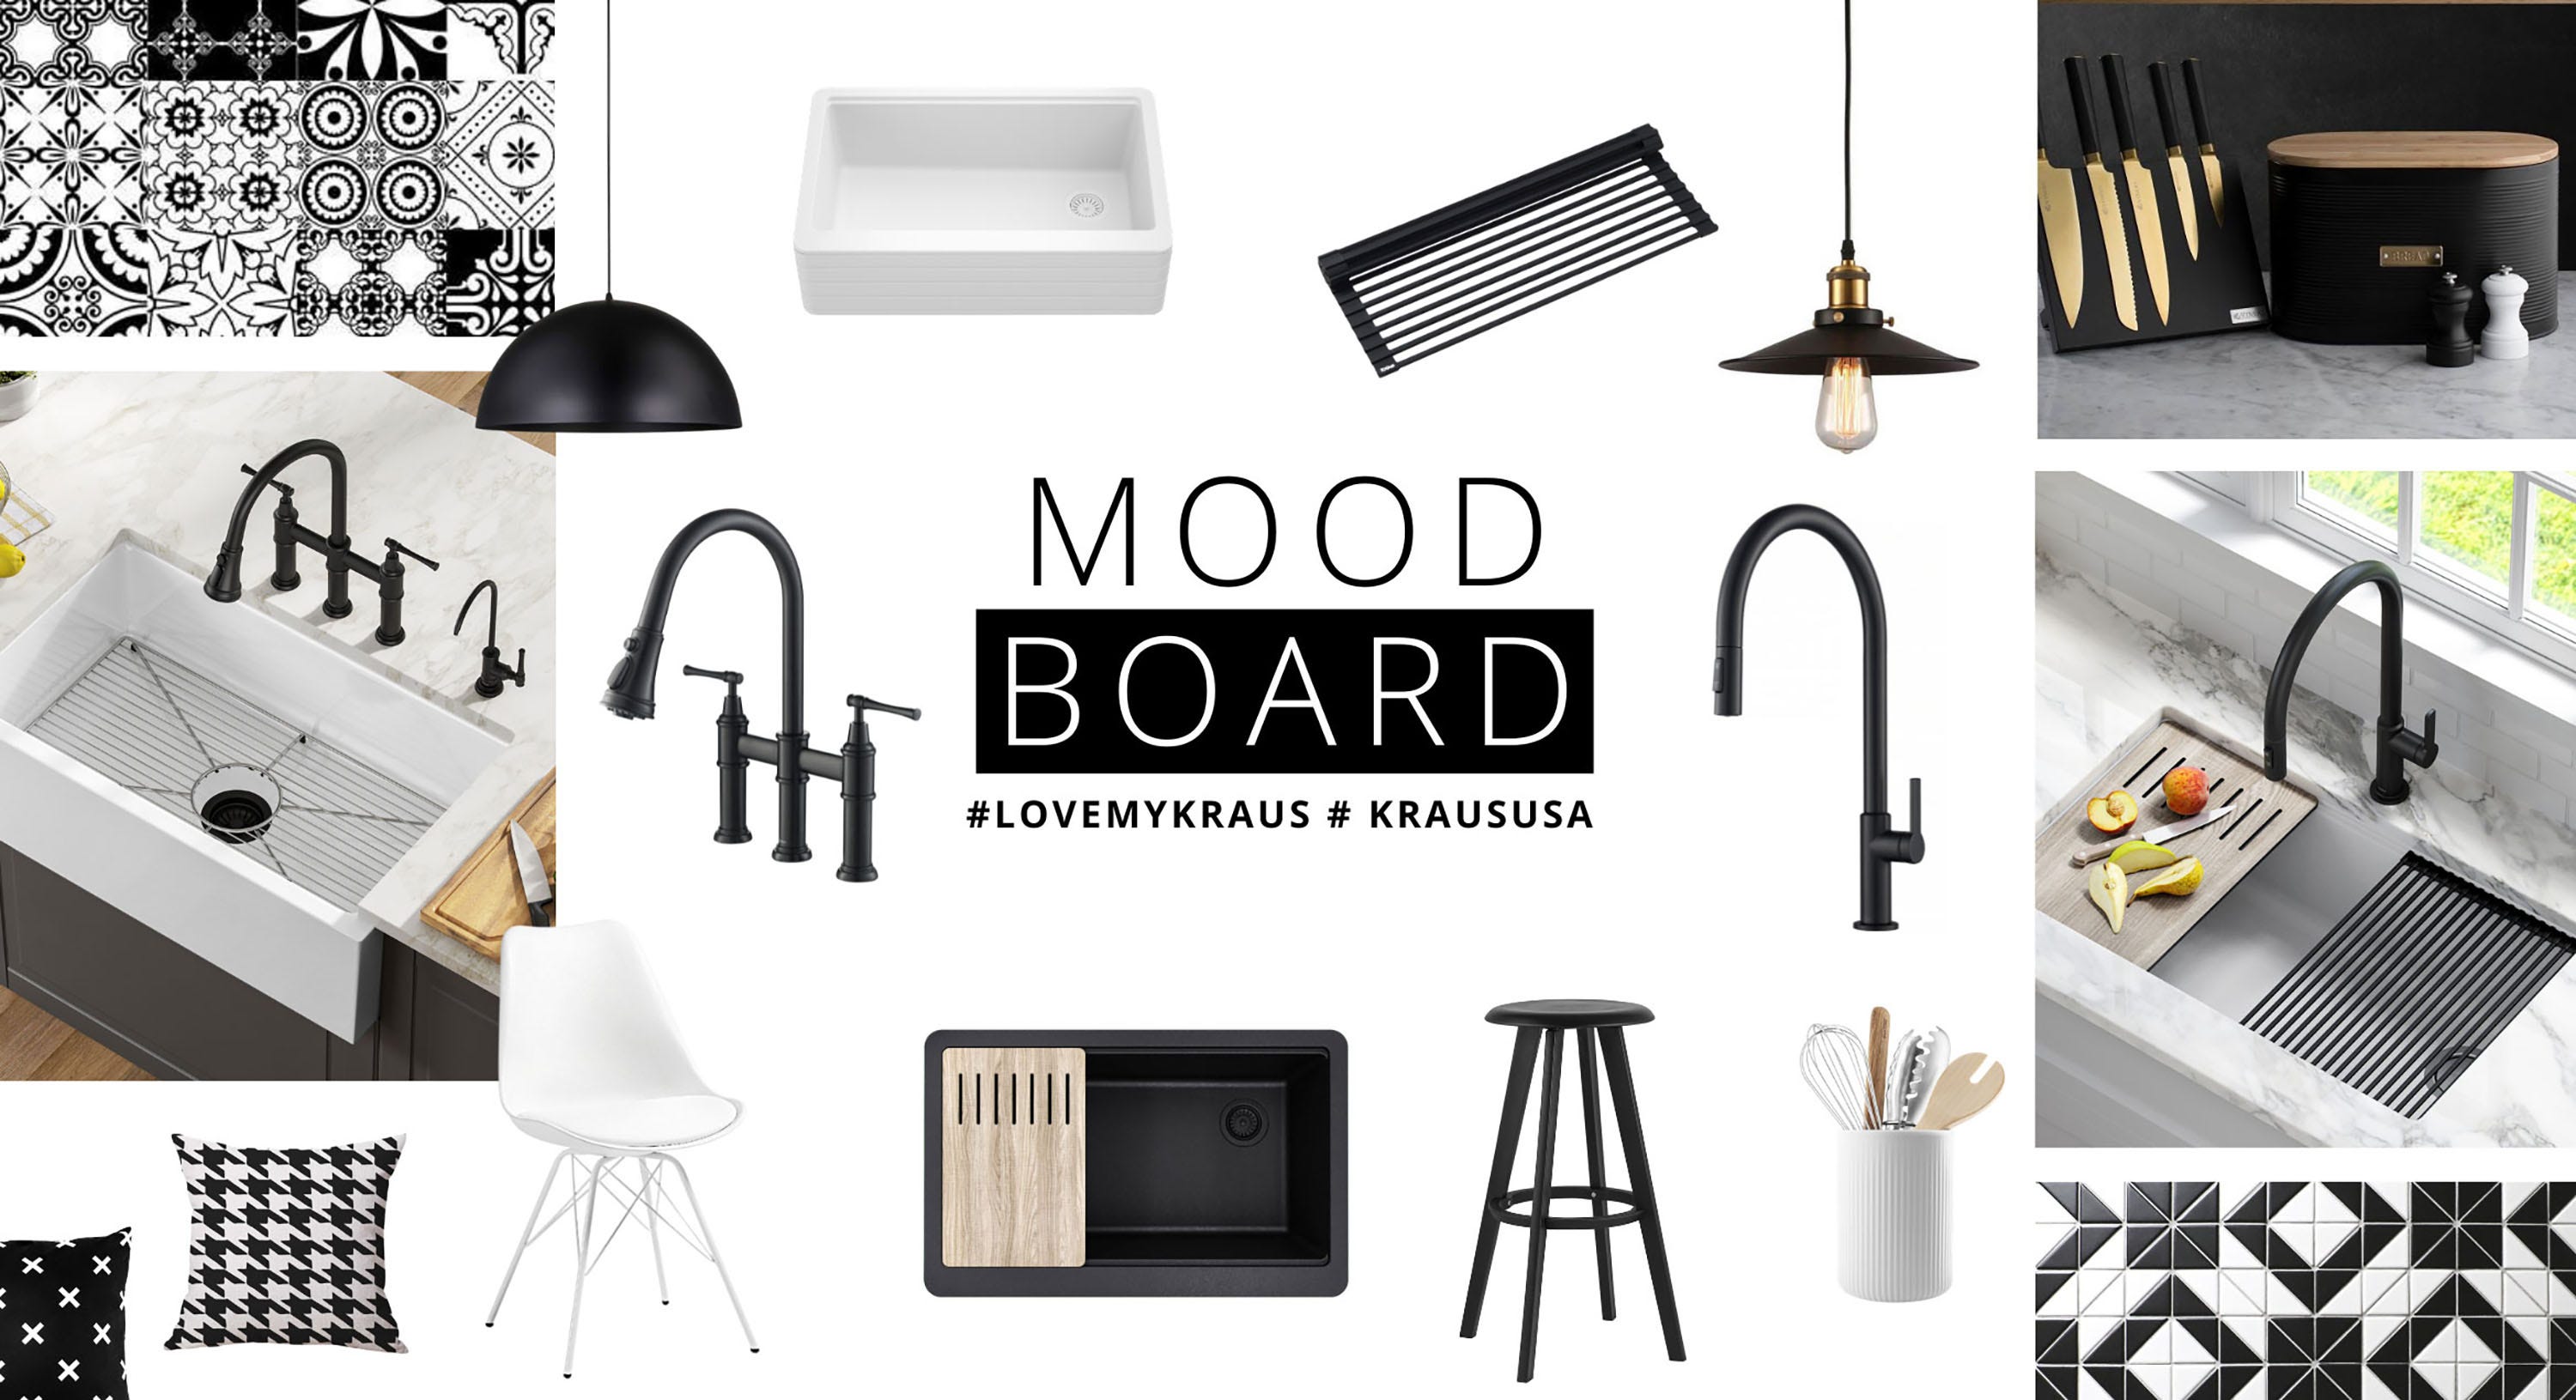
8 Steps to Making the Perfect Mood Board for Your Renovation Project
Categories

If you are like most people, we’re guessing that you have been cooking at home more often lately. Probably a lot more!
In the last year, social media feeds have become loaded with images of all our foodie friends making first attempts at home-cooked creations. After toilet paper and hand sanitizer, yeast was the next thing to be stripped from supermarket shelves in 2020, as Americans collectively learned how to make homemade bread. And last year, the Food Network’s viewership rose by a whopping 26% over 2019!
With more time spent at home, people have been given the opportunity to enjoy cooking again. Preparing dinner has shifted from being just another item on the to-do list to a tasty opportunity for creative exploration. The kitchen has resurfaced as the heart of the home – a place for families to share meals, socialize, and relax with one another.
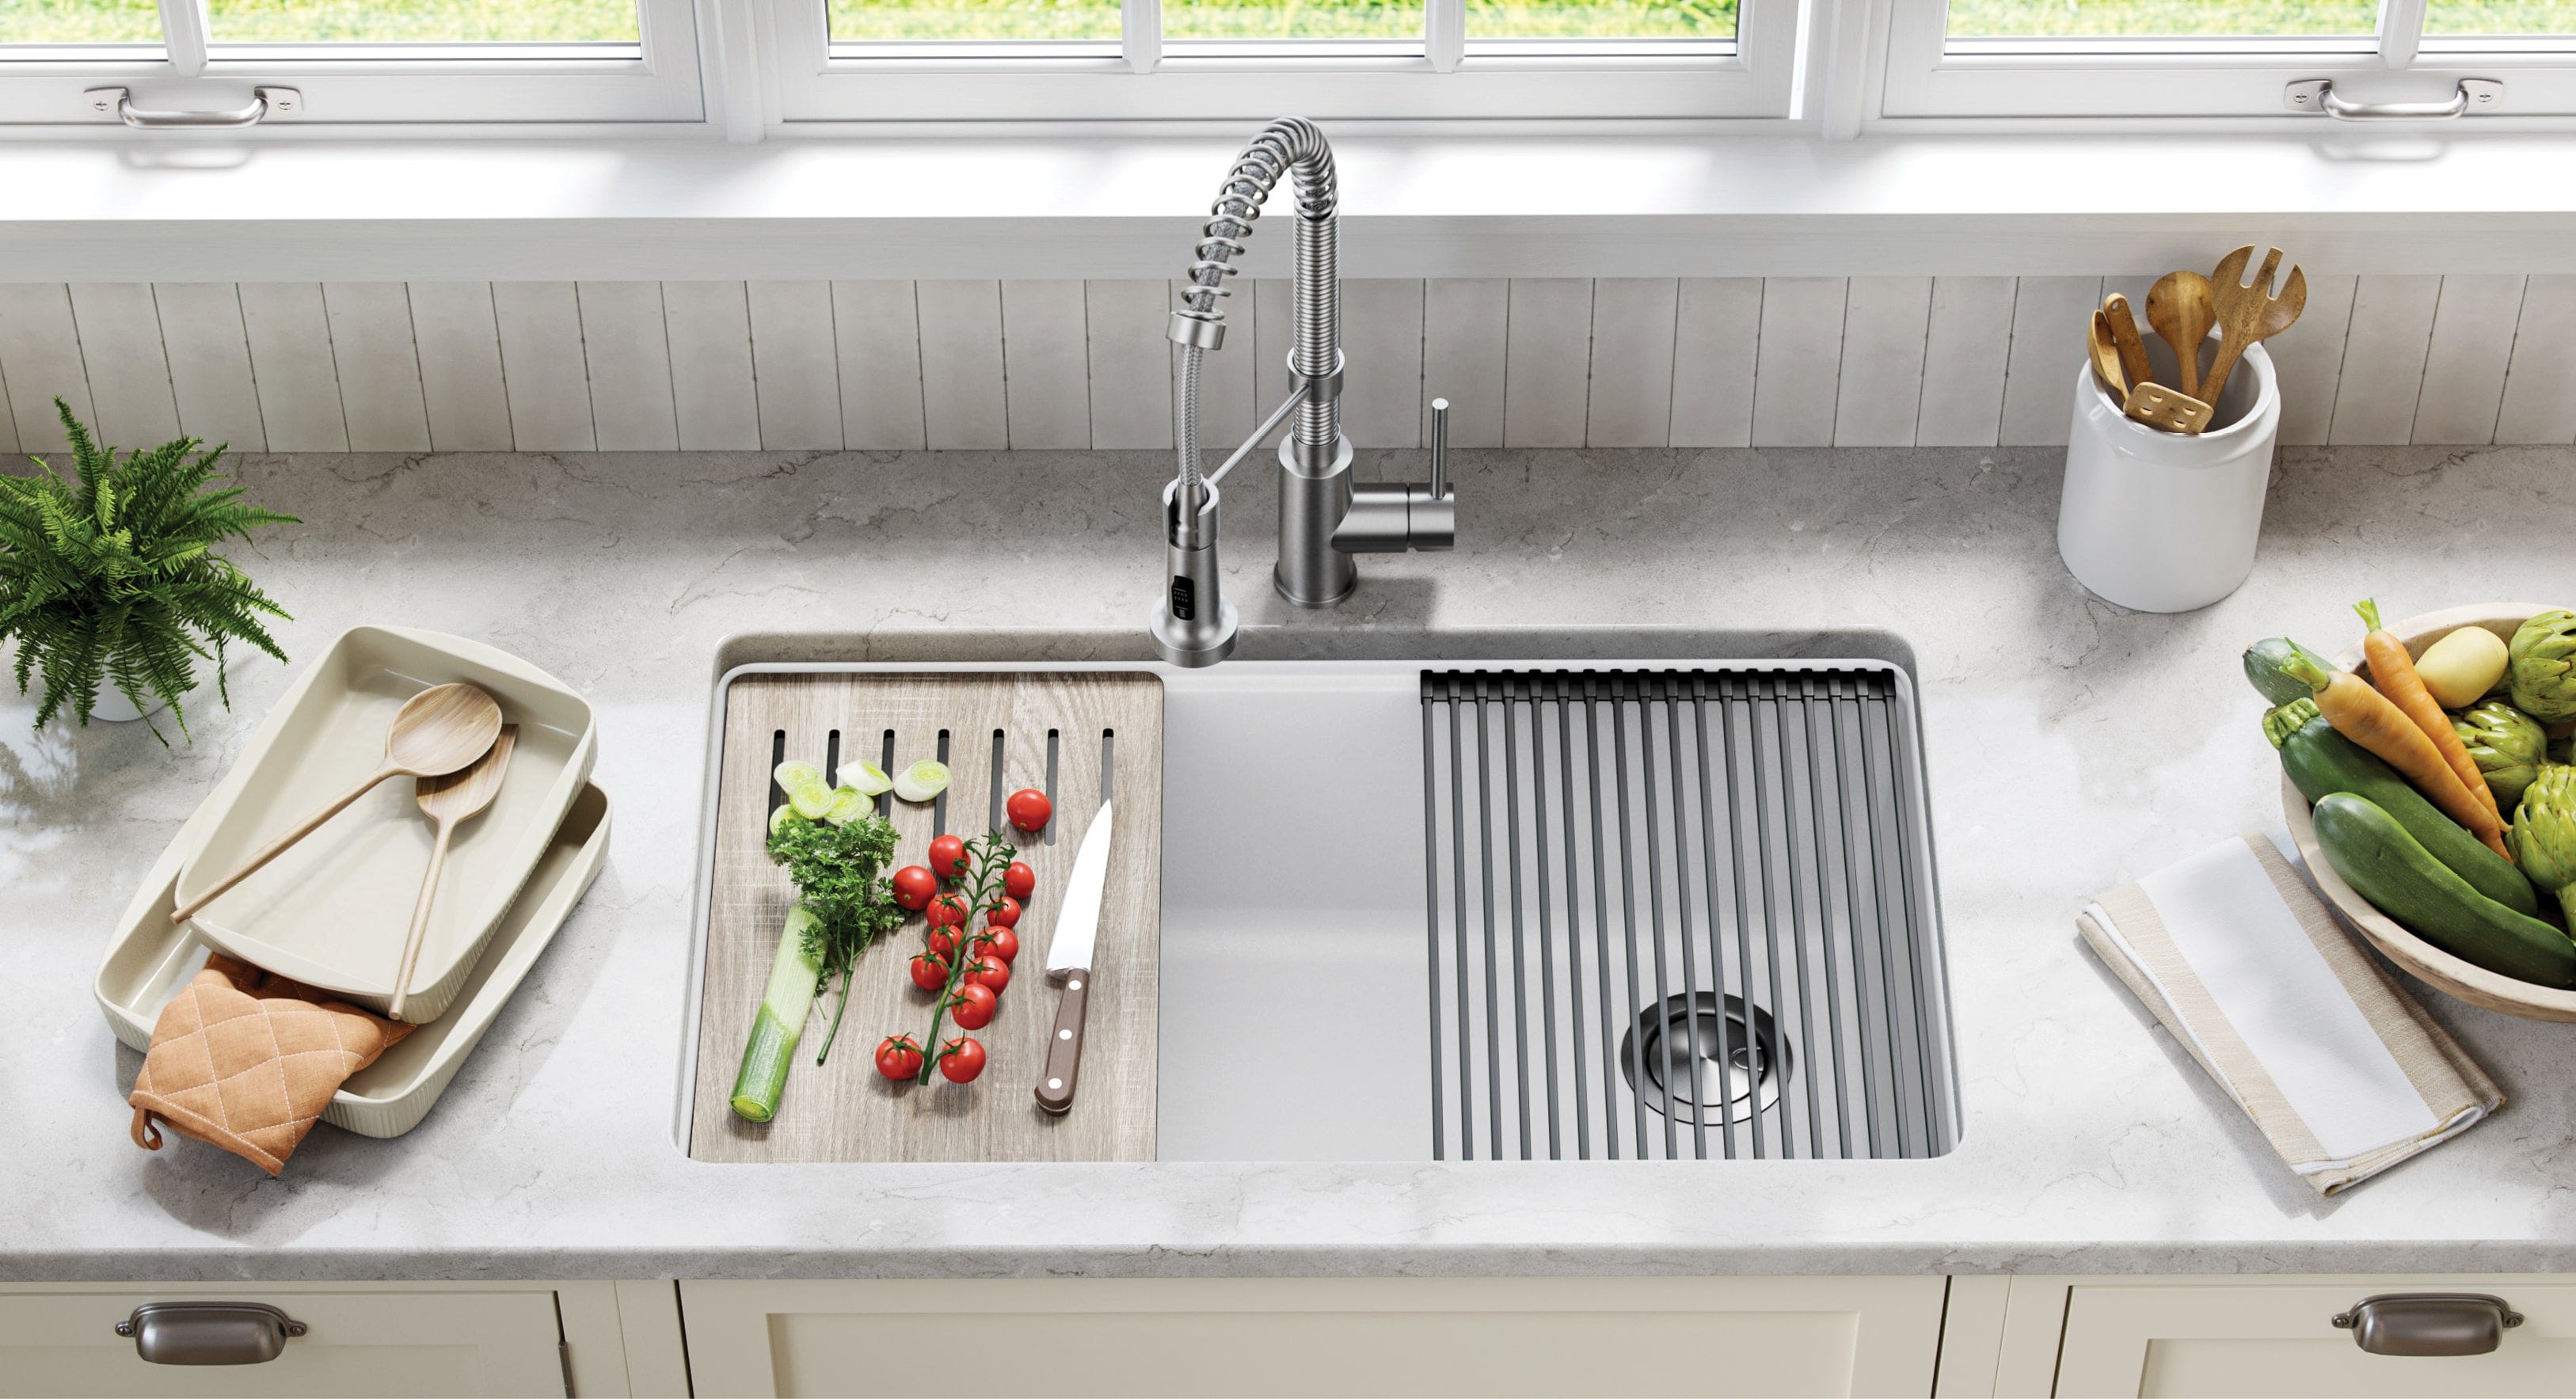
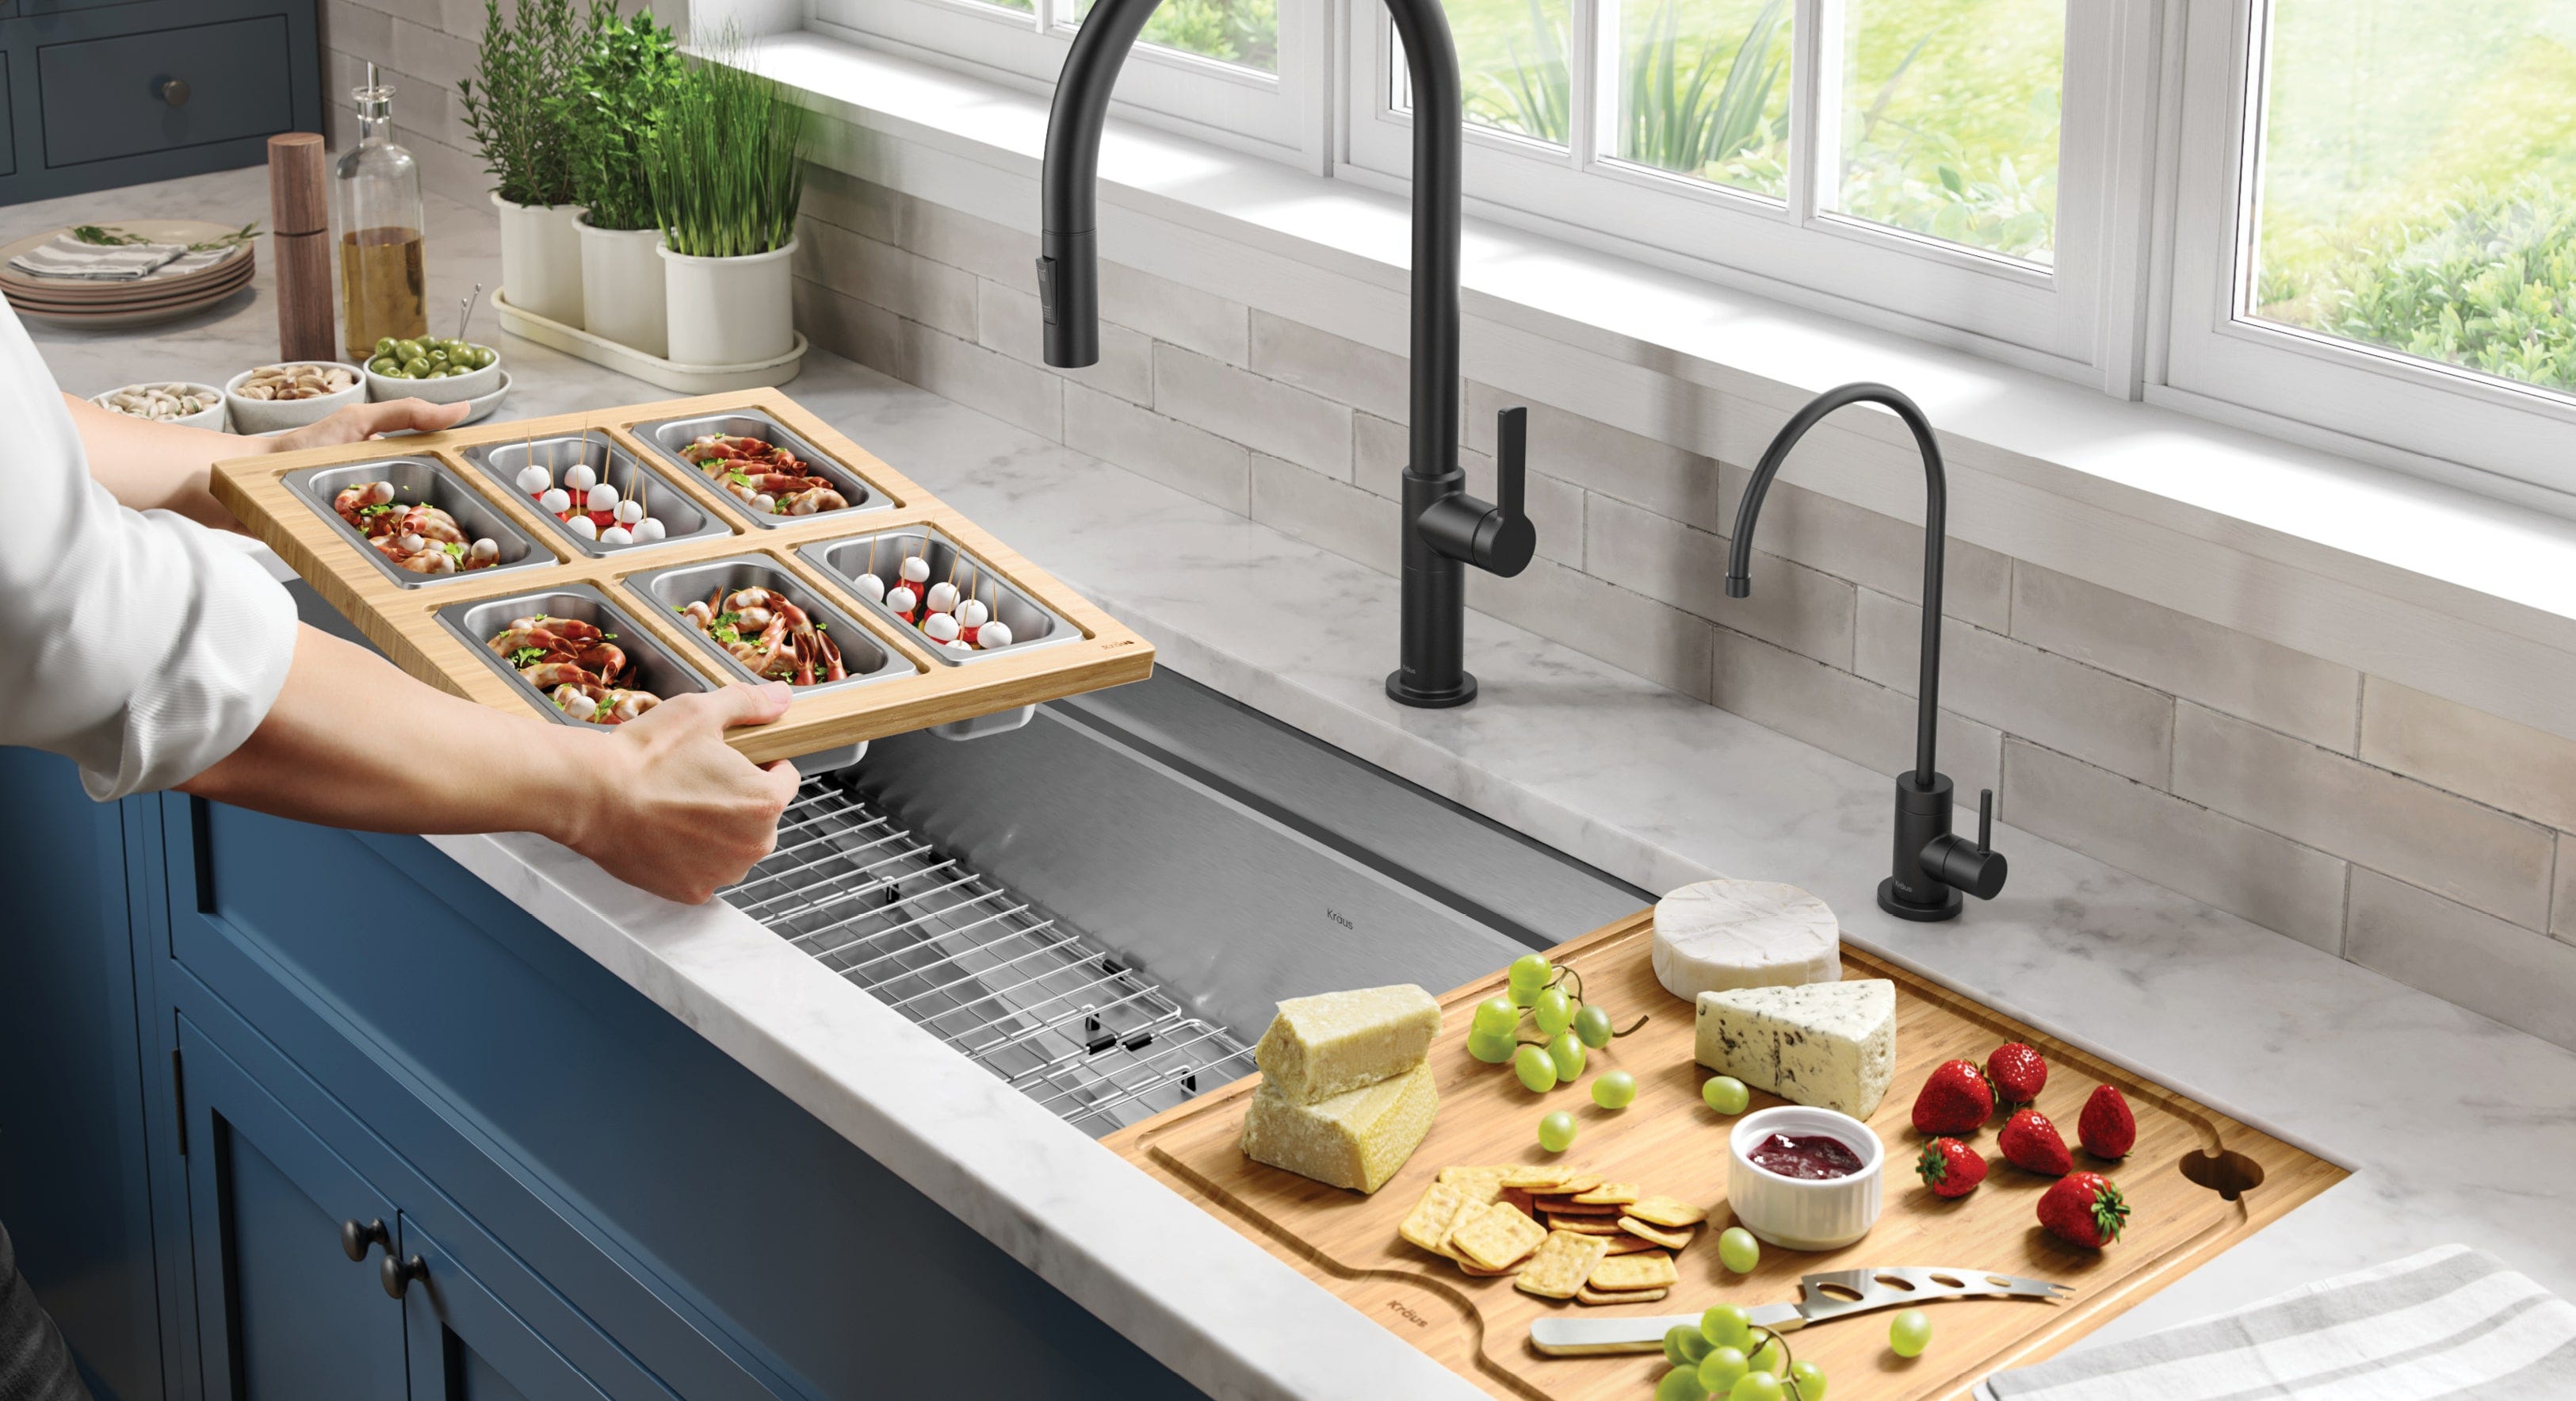
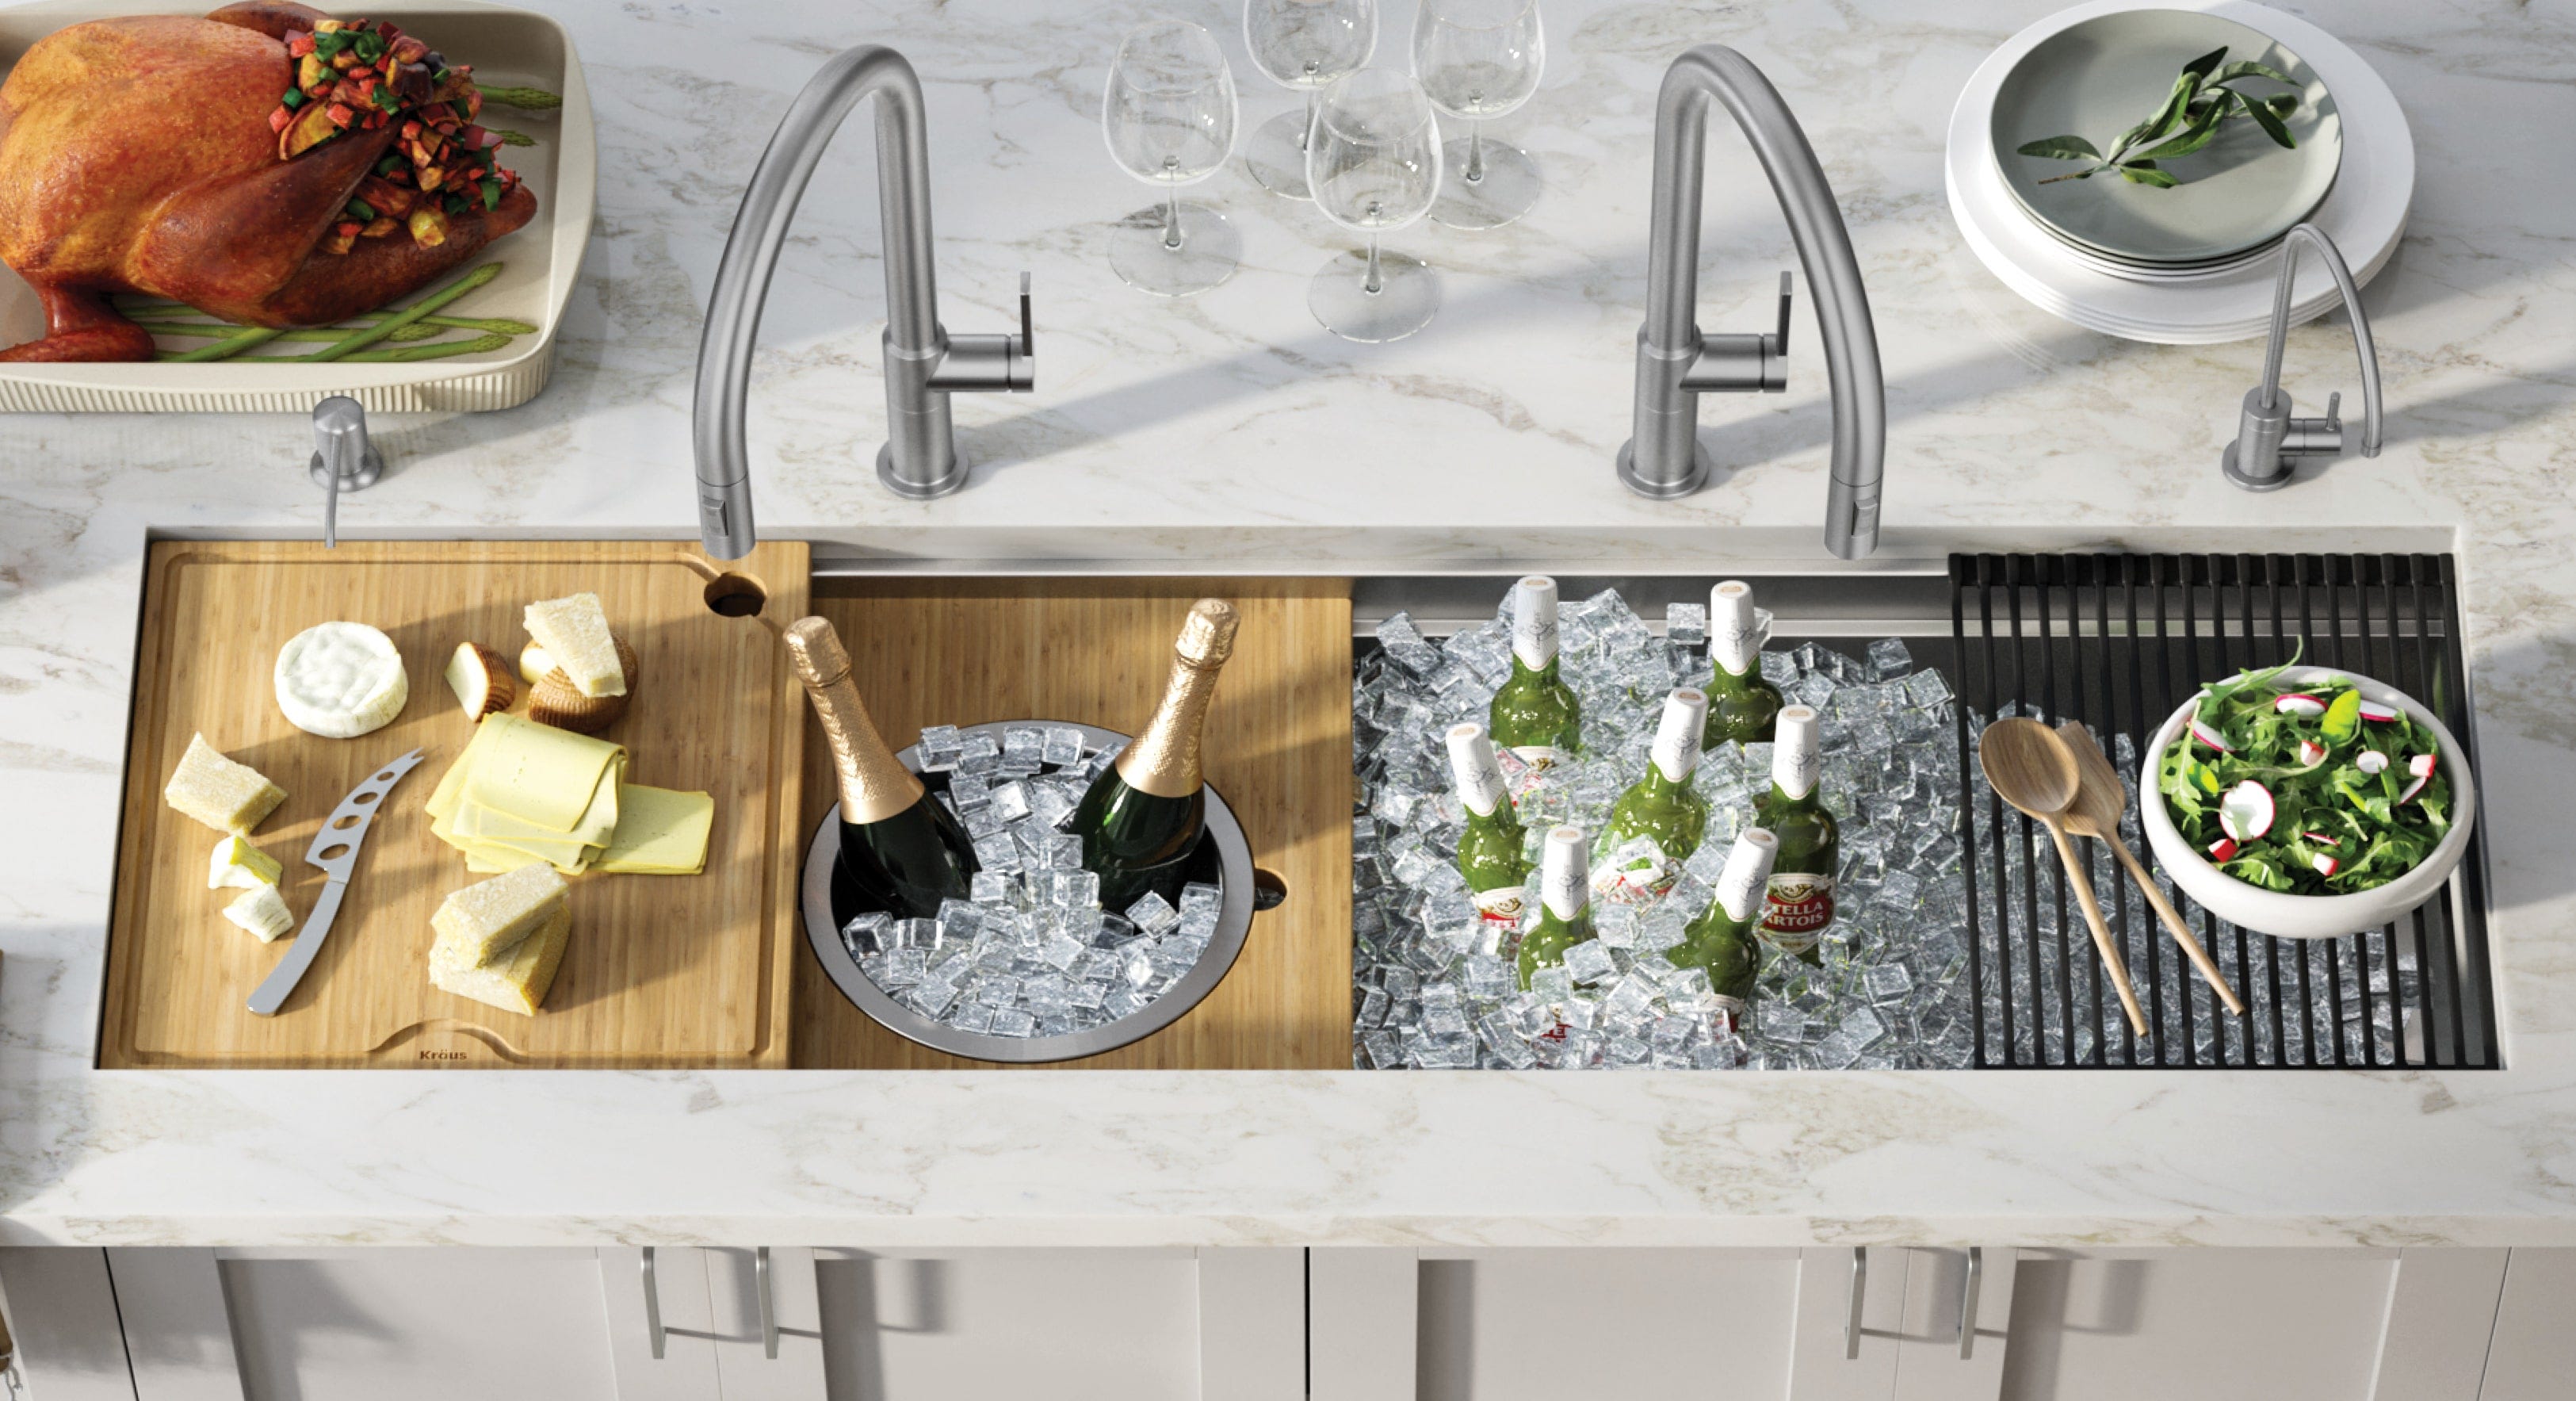
But as we make this shift from take-out menus to family cookbooks, many are noticing that their kitchens are not set up to handle the workload. Whether you are lacking counter space, or just looking for better tools to streamline your kitchen workflow, there is a good chance that Kraus® Workstation Sinks can offer a solution that will jump-start your home cooking creations. Engineered with an integrated ledge that supports custom-fit sliding accessories, this design allows you to work directly over the sink, saving valuable counter space and boosting kitchen functionality from meal prep to serving to clean-up.
Still not sure that a workstation sink is right for you? We’ve put together a list of 10 kitchen tasks that are made much easier with Kraus® Workstation Sinks.
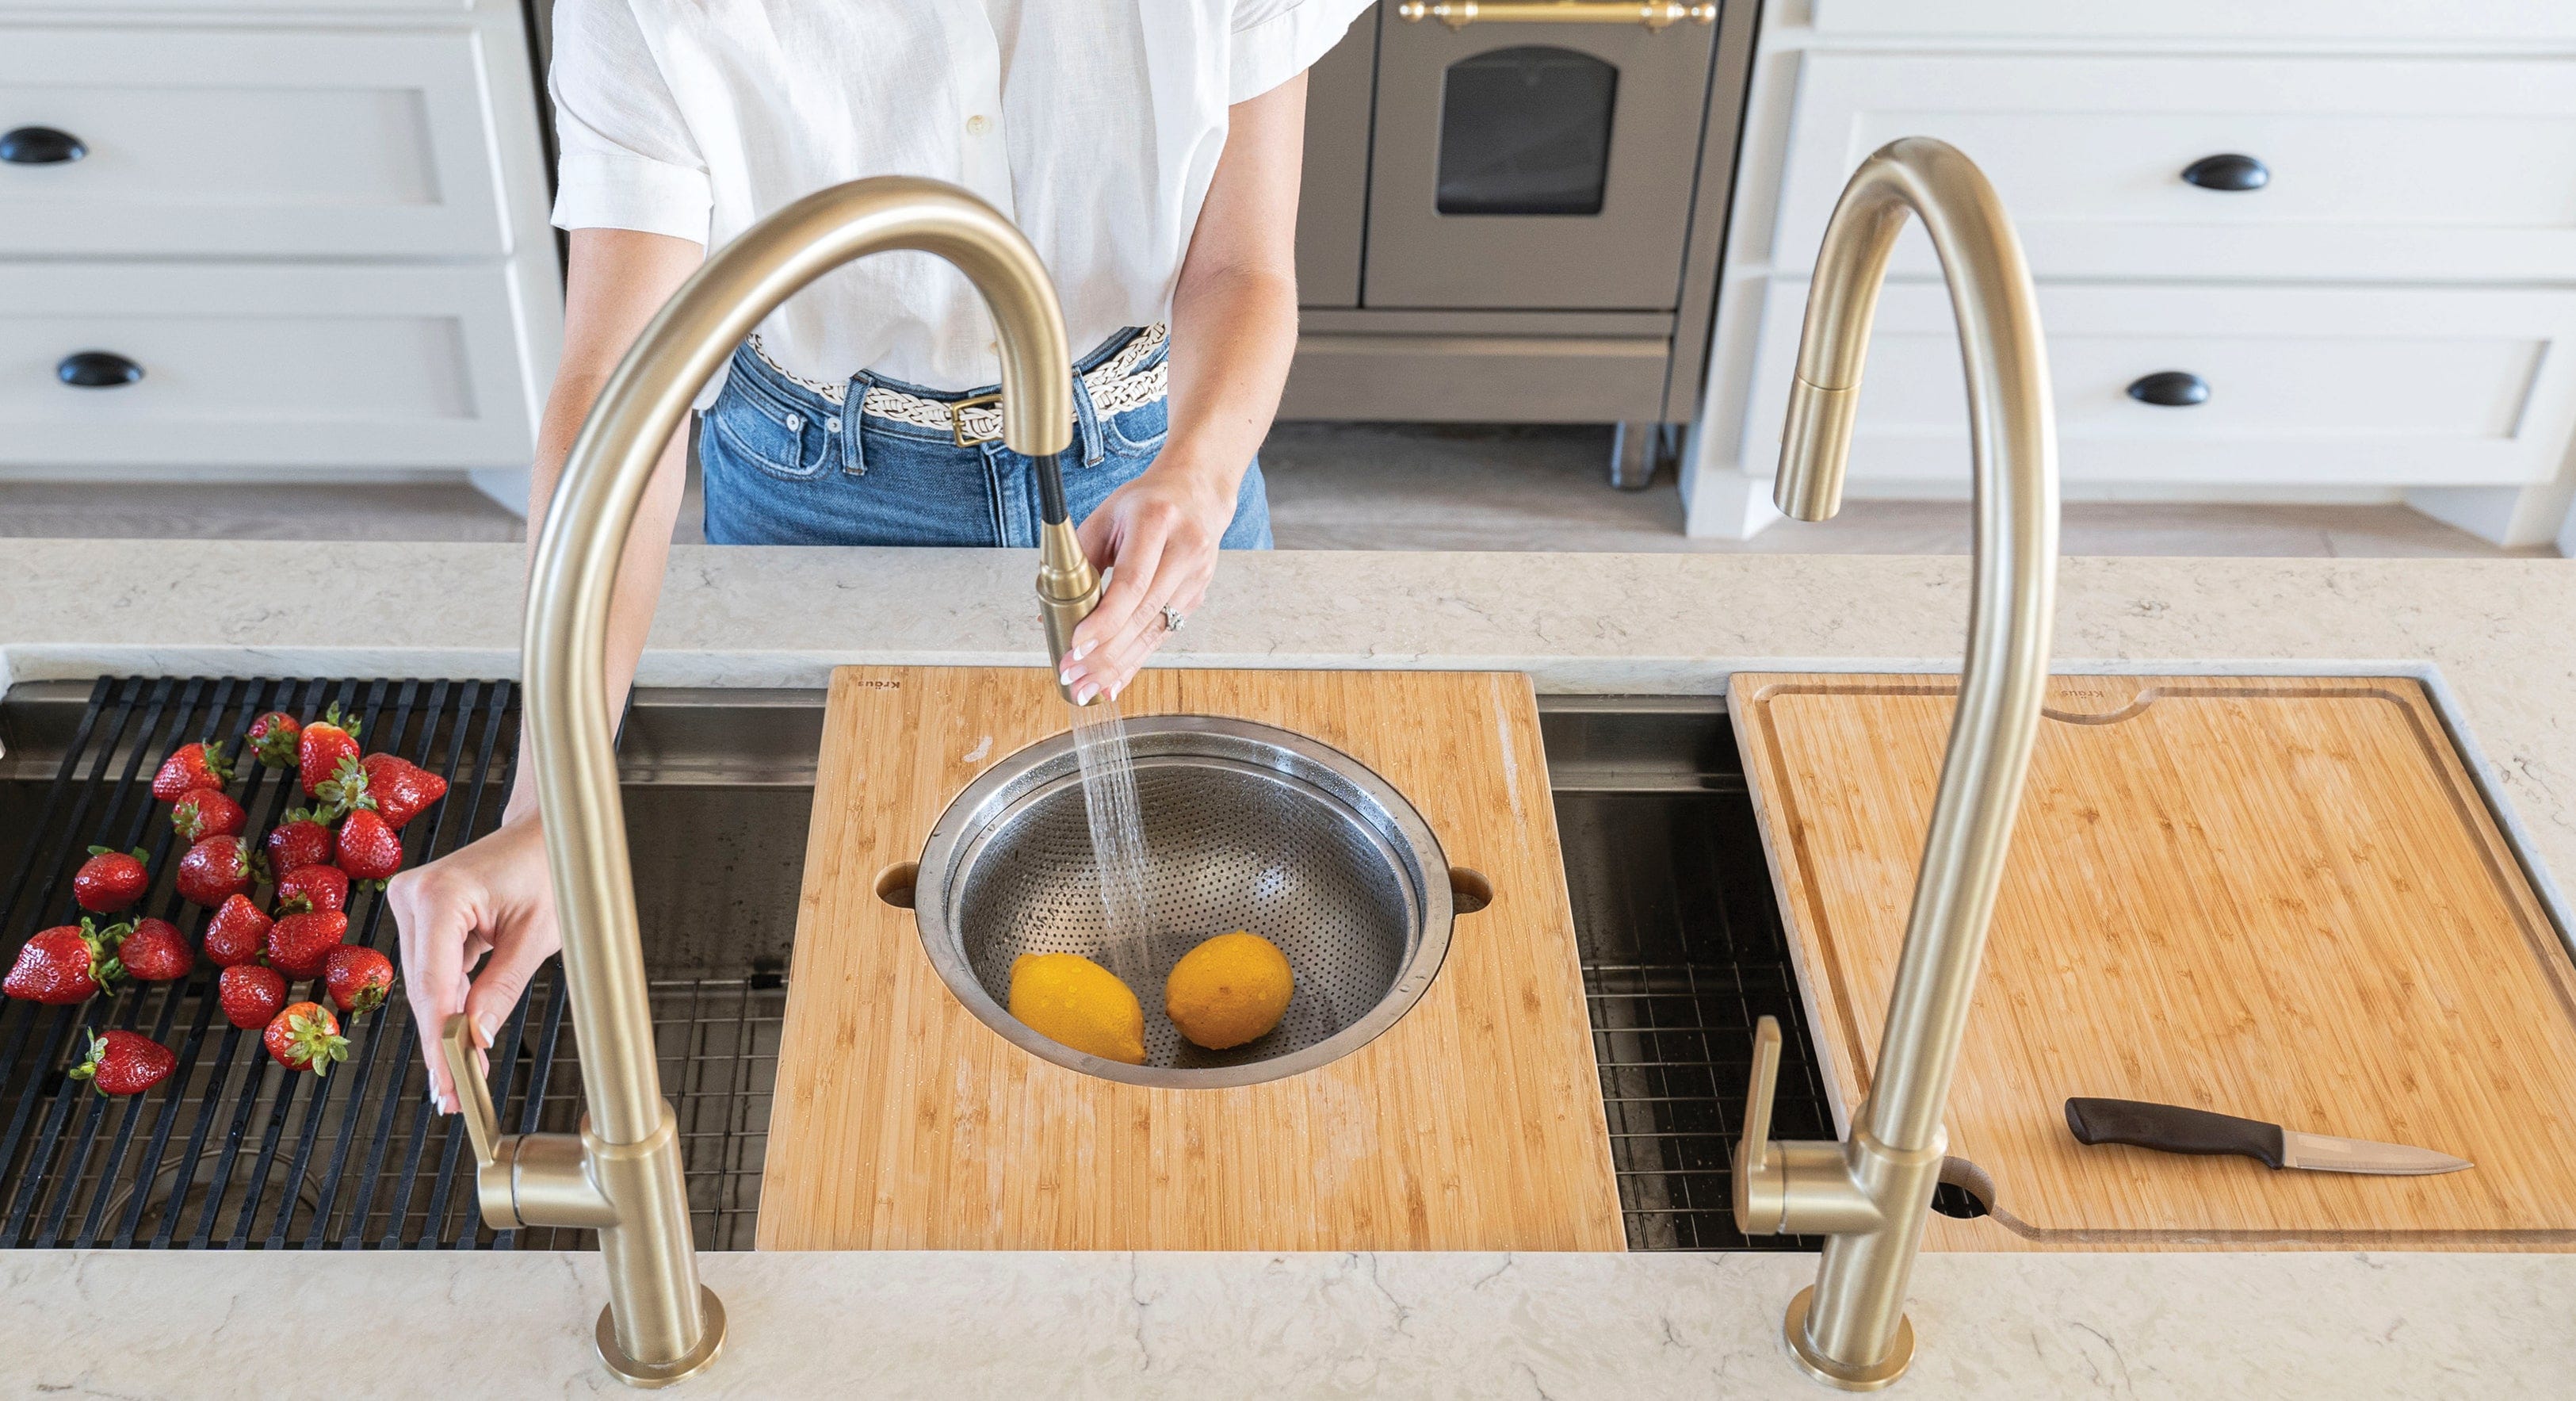
#1 Rinsing Produce
So you’re back from the grocery store, and ready to whip up some dinner. First things first – toss those veggies in your Kraus® Workstation Colander and give them a thorough rinse! The accessory board sits flush against the workstation ledge, leaving both of your hands free for washing to ensure that you hit every spot.
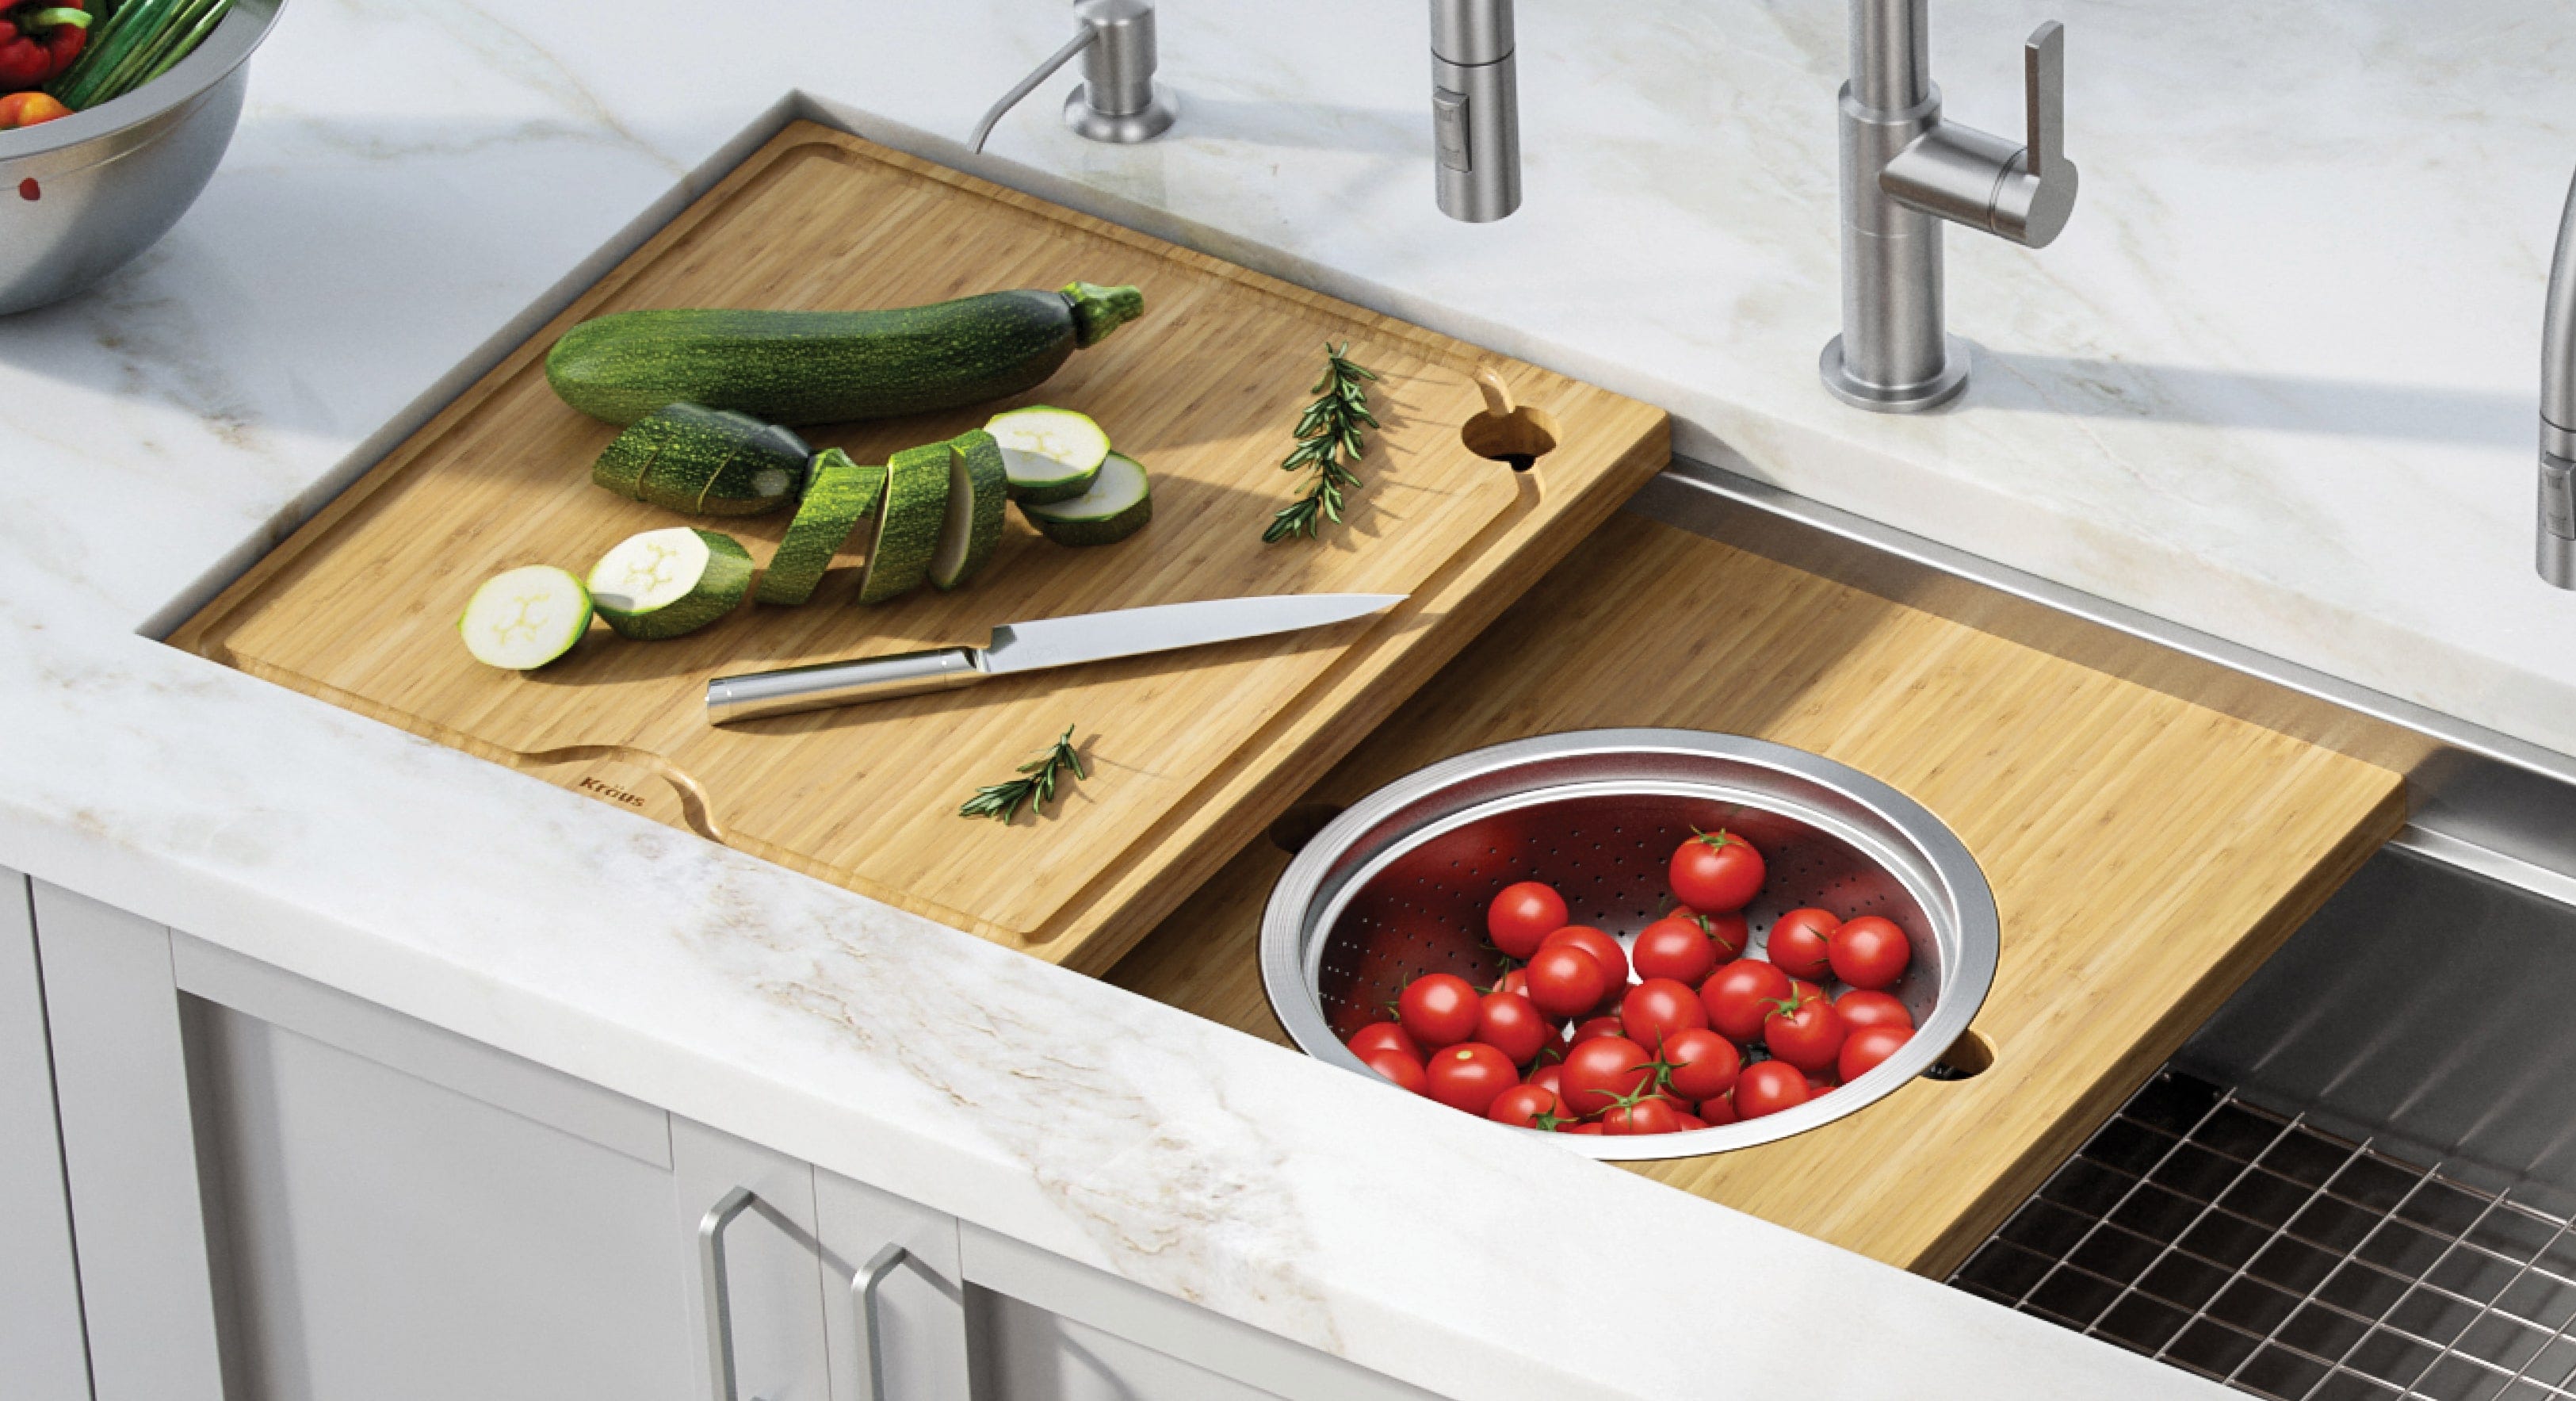
#2 Chopping Veggies & Tossing Salad
Kore™ Workstations keep the mess to a minimum by placing all the action over your sink. After rinsing, move your veggies straight to the cutting board without worrying about water dripping on the kitchen counters. When you are done chopping, you can even swipe the scraps directly into your garbage disposal without any hassle. Working in a compact kitchen where space is at a premium? This design saves room on the countertop by allowing you to slice and dice right over your sink!
The variety of Workstation Accessories allows you to seamlessly switch from task to task without skipping a beat! Making a salad? Slide those veggies from your cutting board directly into your Workstation Mixing Bowl with the brush of a hand. Just add dressing, give it a toss, and you are ready to serve!
#3 Dishing Out Meals
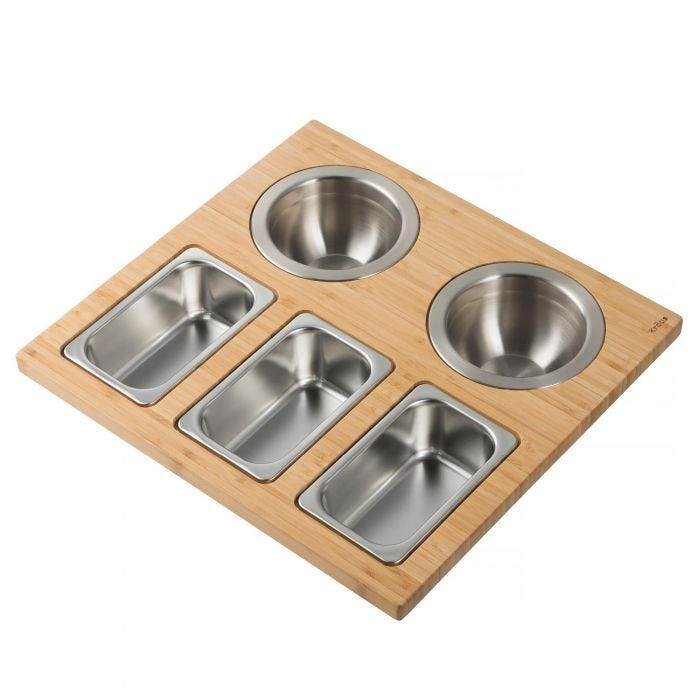
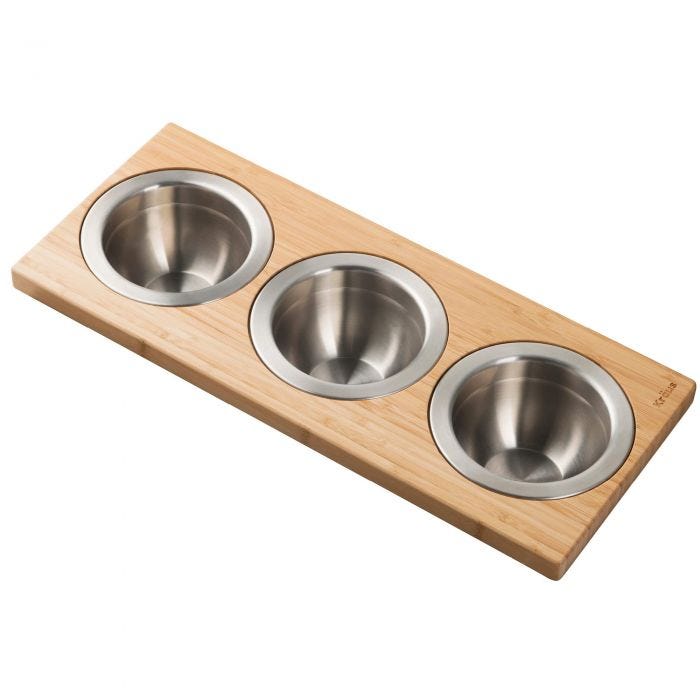
Perfect for entertaining guests or adding a fun element to family dinner, Kore™ Workstation Serving Boards allow you to easily dish out meals for large groups of people. The bamboo accessory boards hold multiple stainless steel bowls that drop securely into place so that you can portion out plates, including sauces, appetizers, and finger foods. When you are ready to serve, the board makes it easy to carry several dishes at once for an easy transition from kitchen to table. These accessories are available in a range of sizes and bowl configurations, offering the flexibility to meet your kitchen needs.
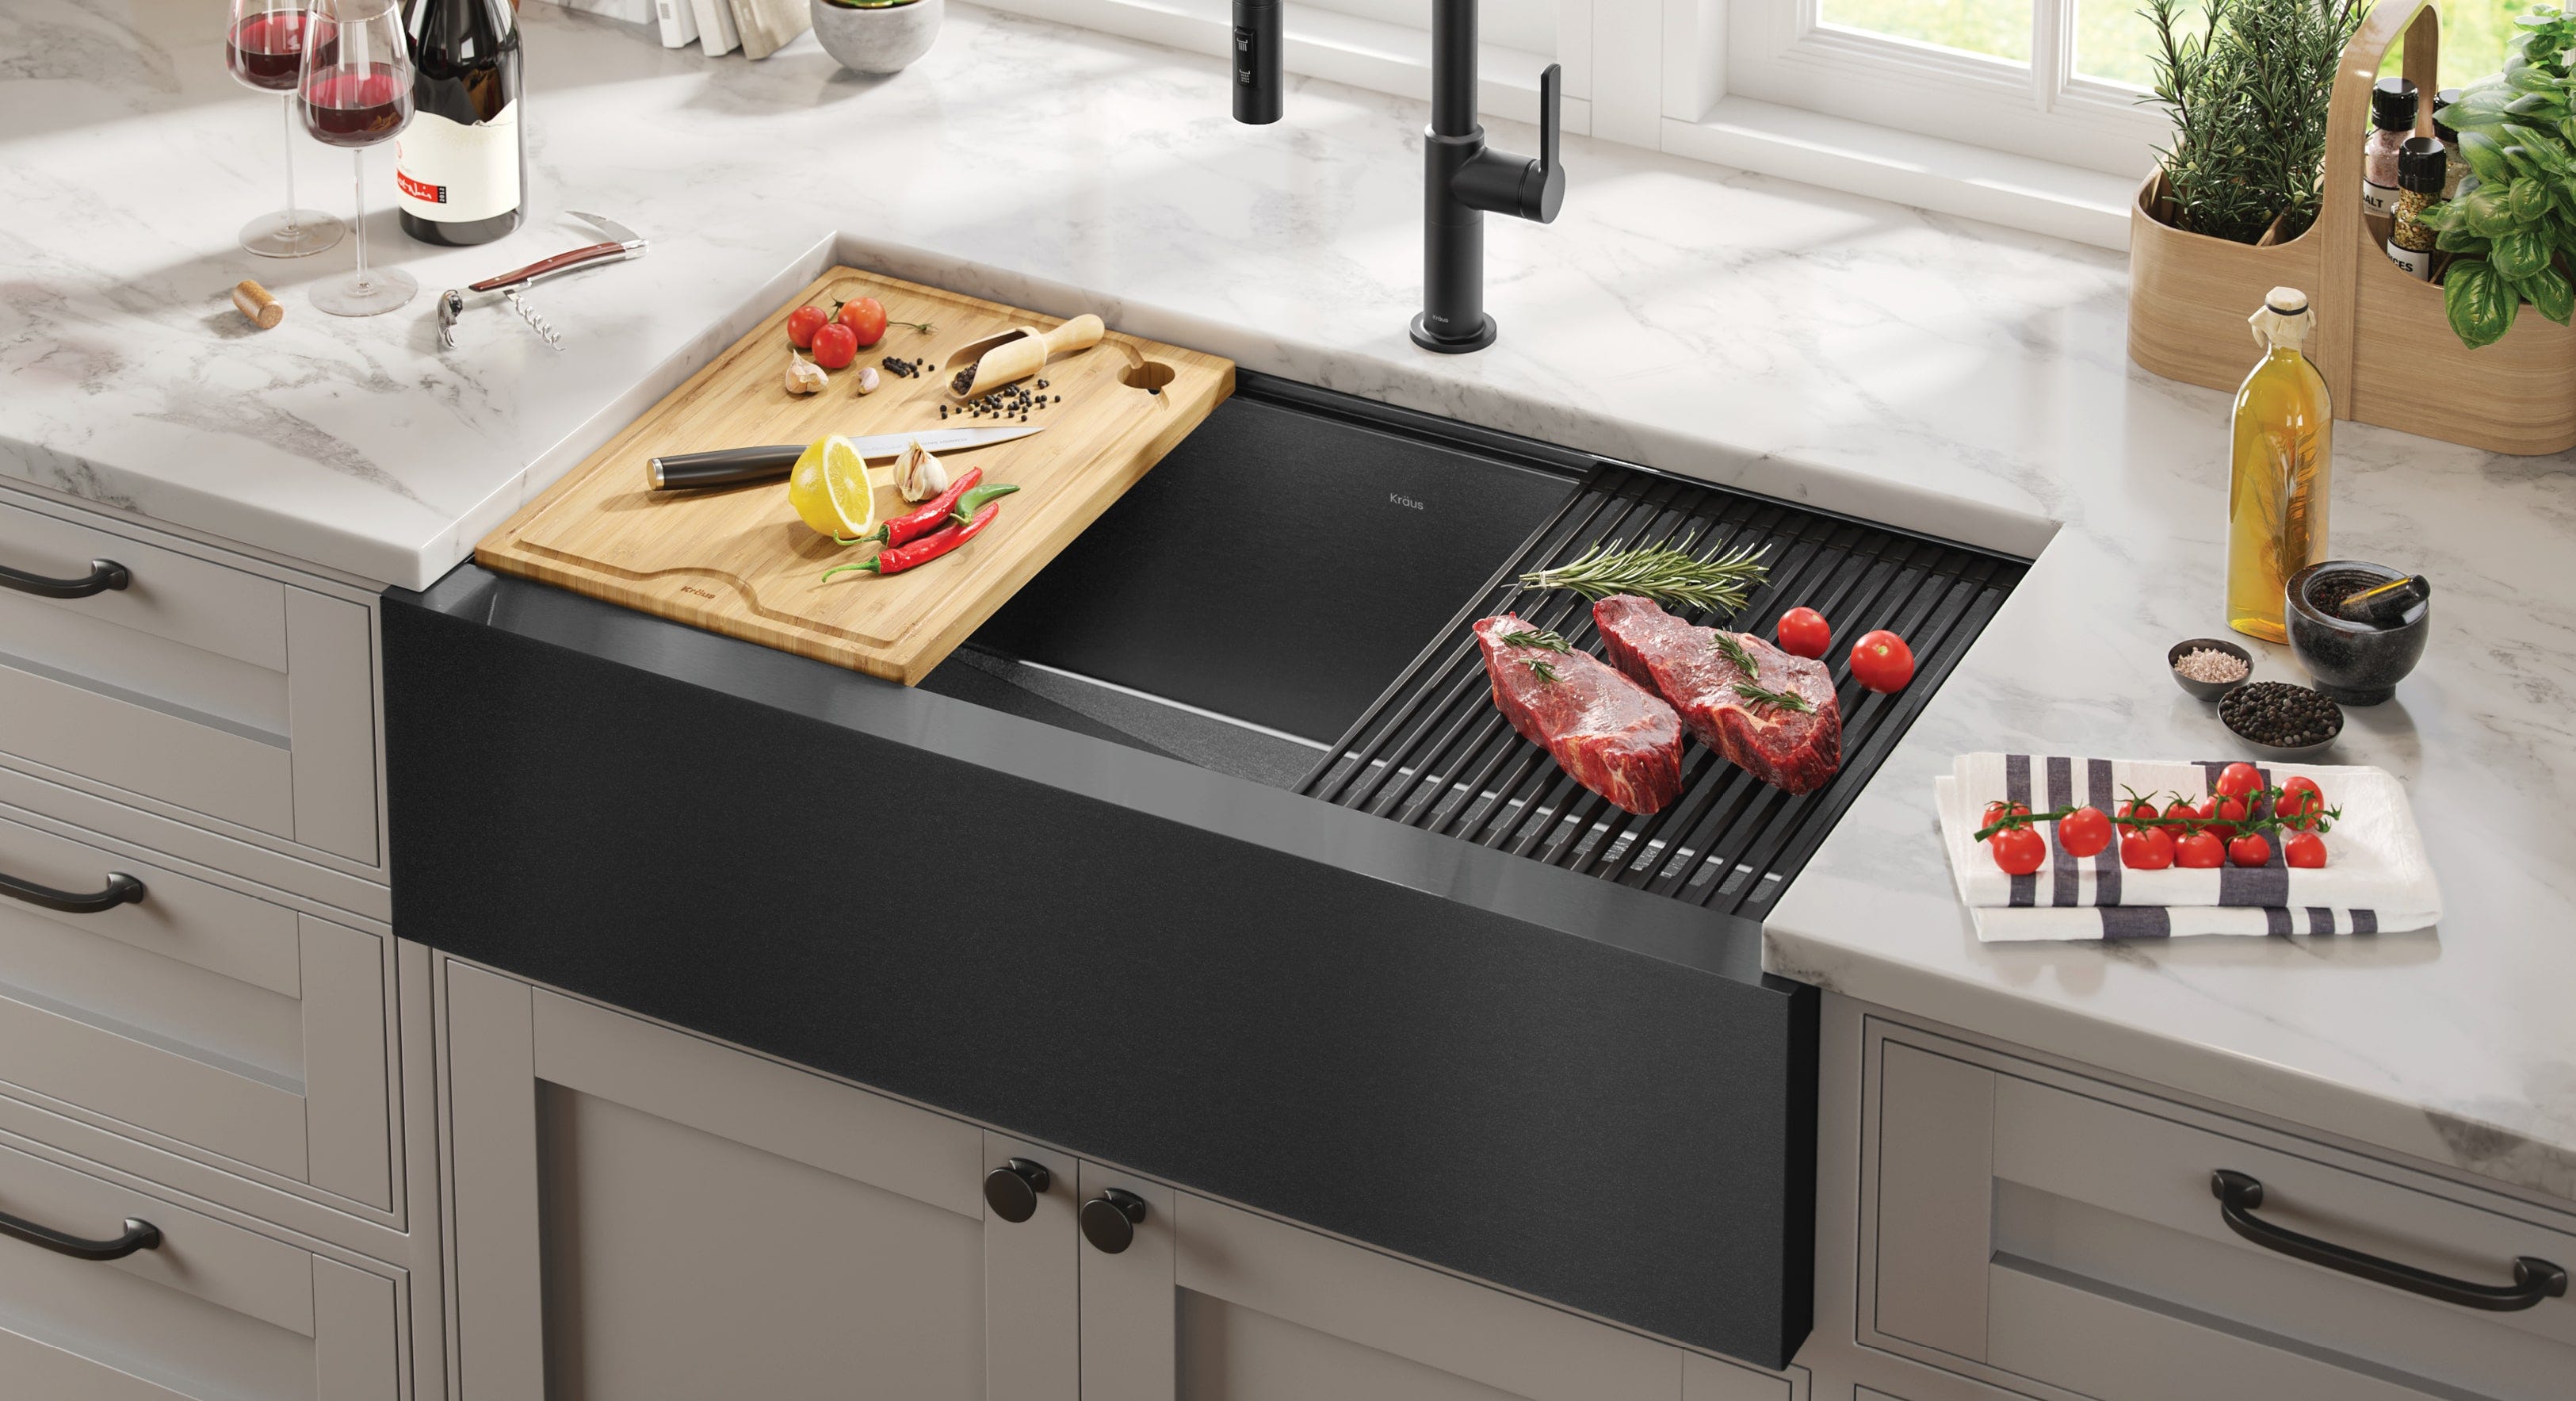
#4 Dry-Rubbing Steaks and Meats
Don’t worry, all you carnivores out there – this sink helps with more than just salads! The Kraus® Workstation Rolling Mat makes a perfect prep station for applying a dry rub to steaks and other meats without any hassle. Don’t be stingy with the seasoning now – life should be packed with flavor! Extra seasoning falls right into the sink to minimize mess on your countertops, and Kraus® Rolling Mats are even dishwasher safe for easy cleaning.
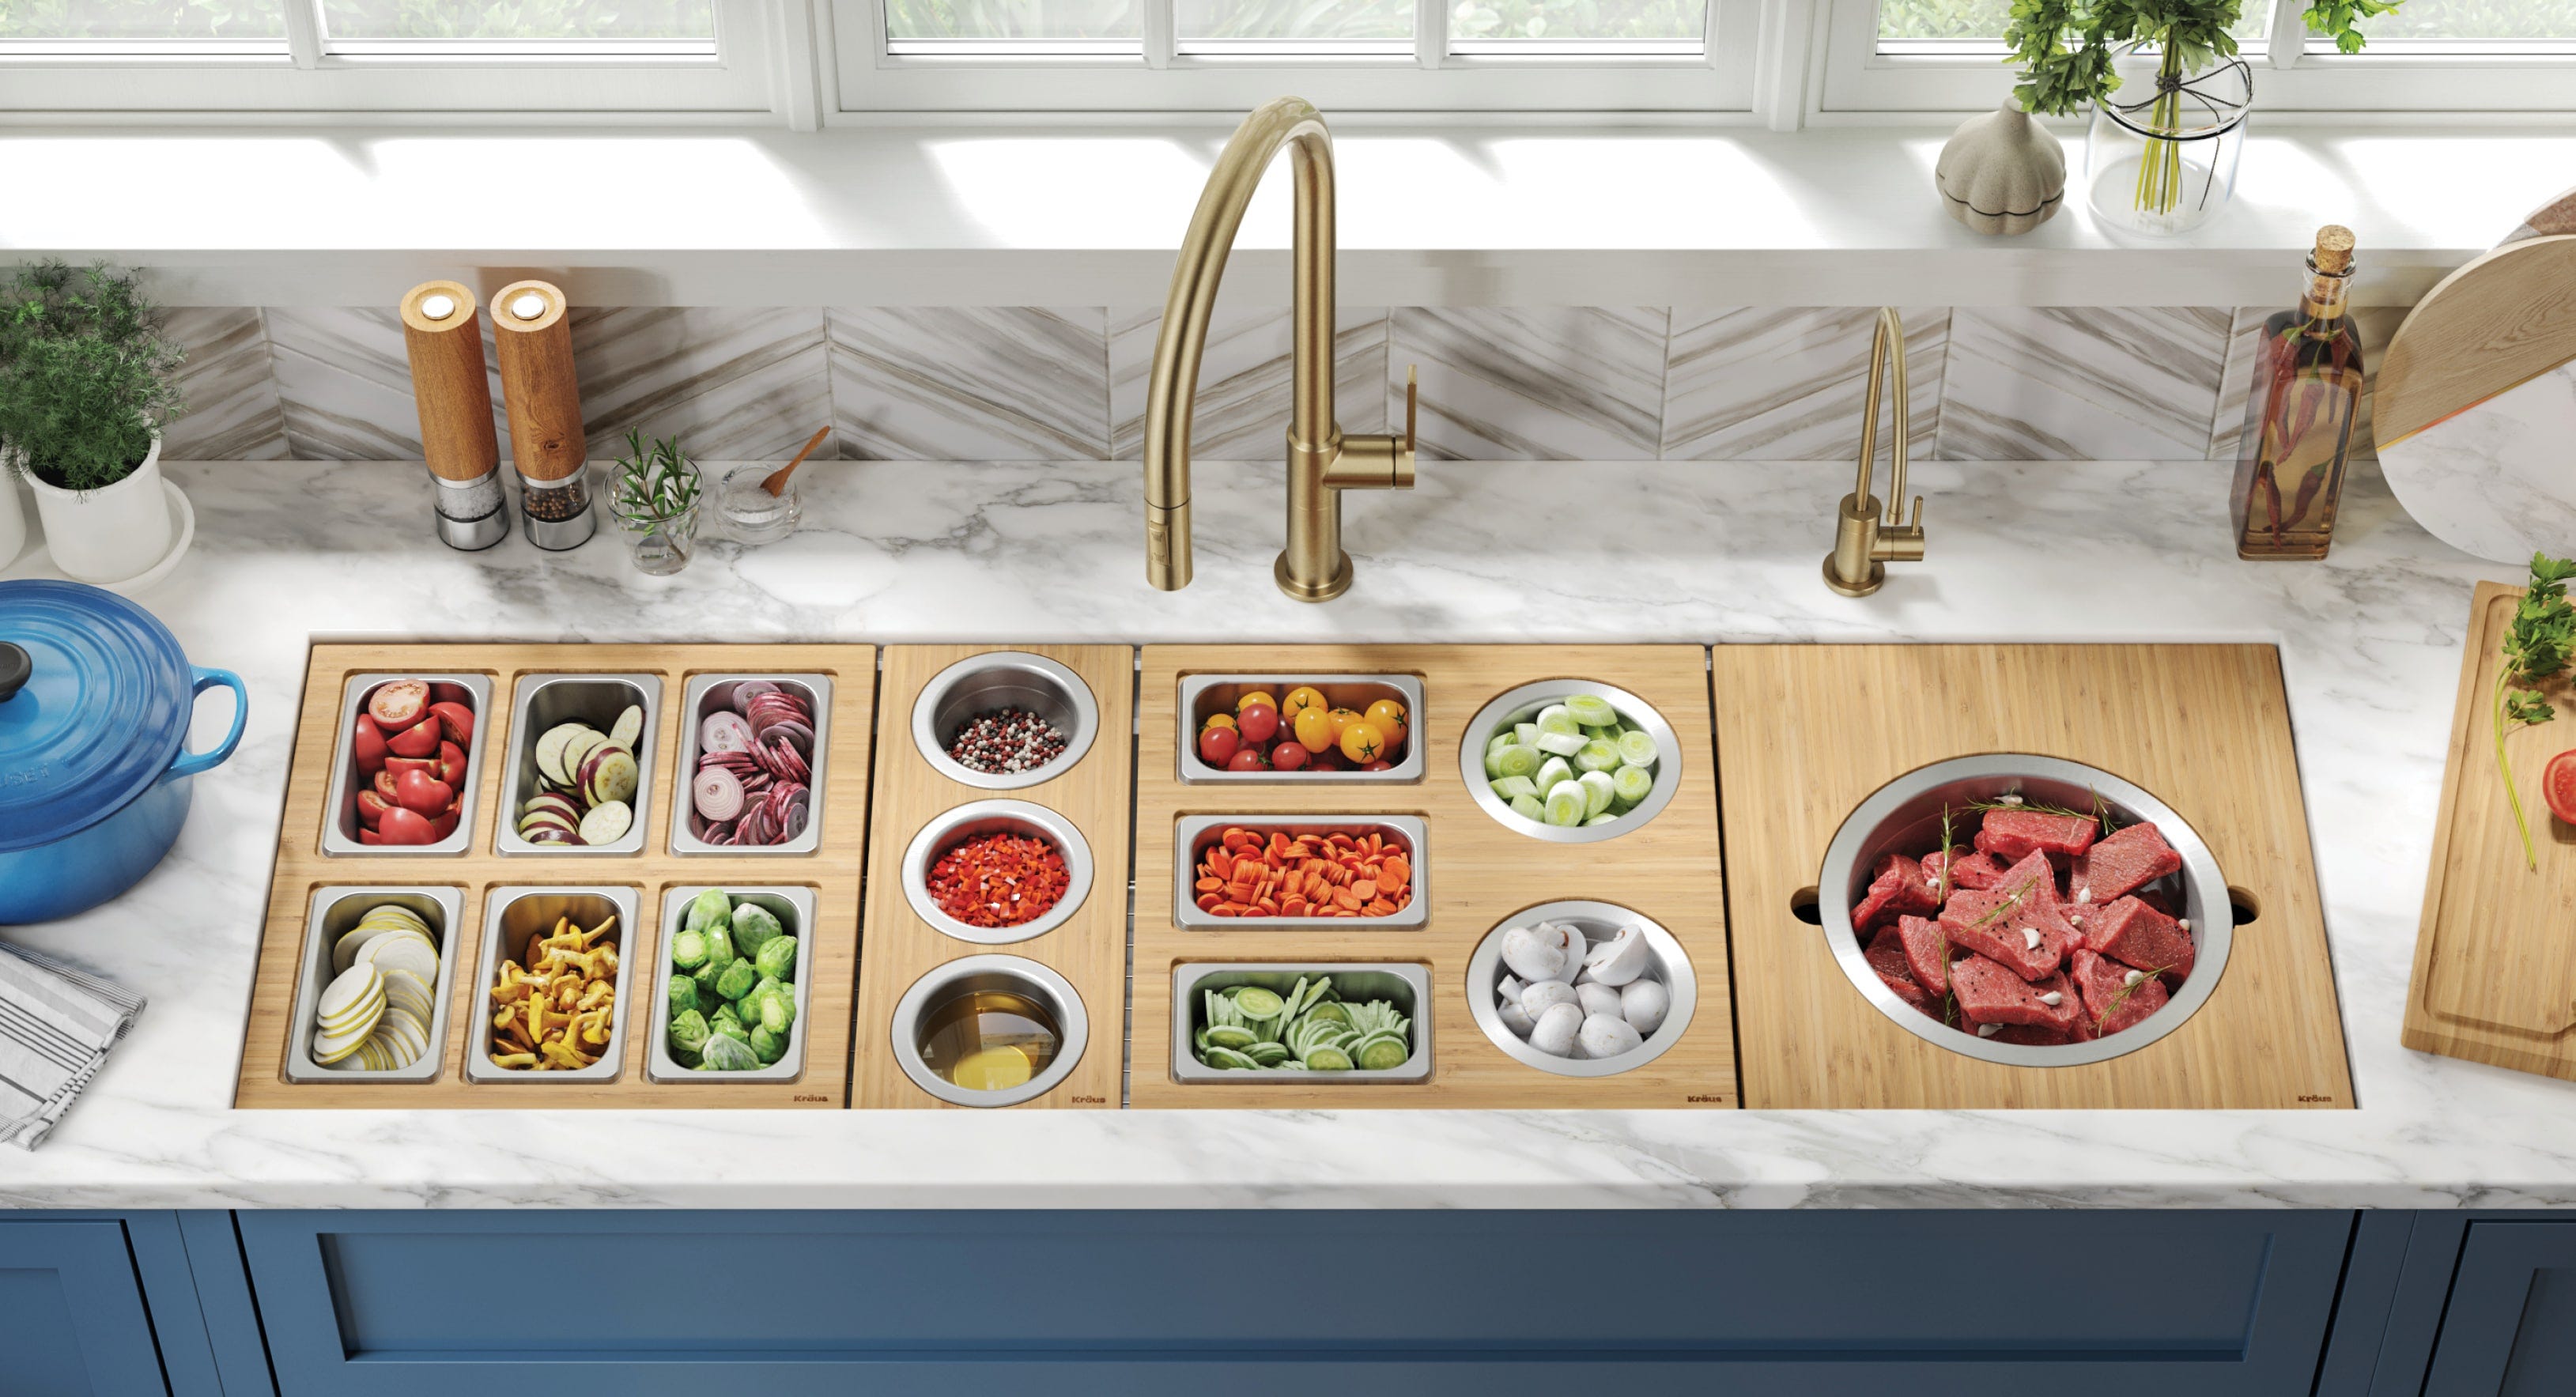
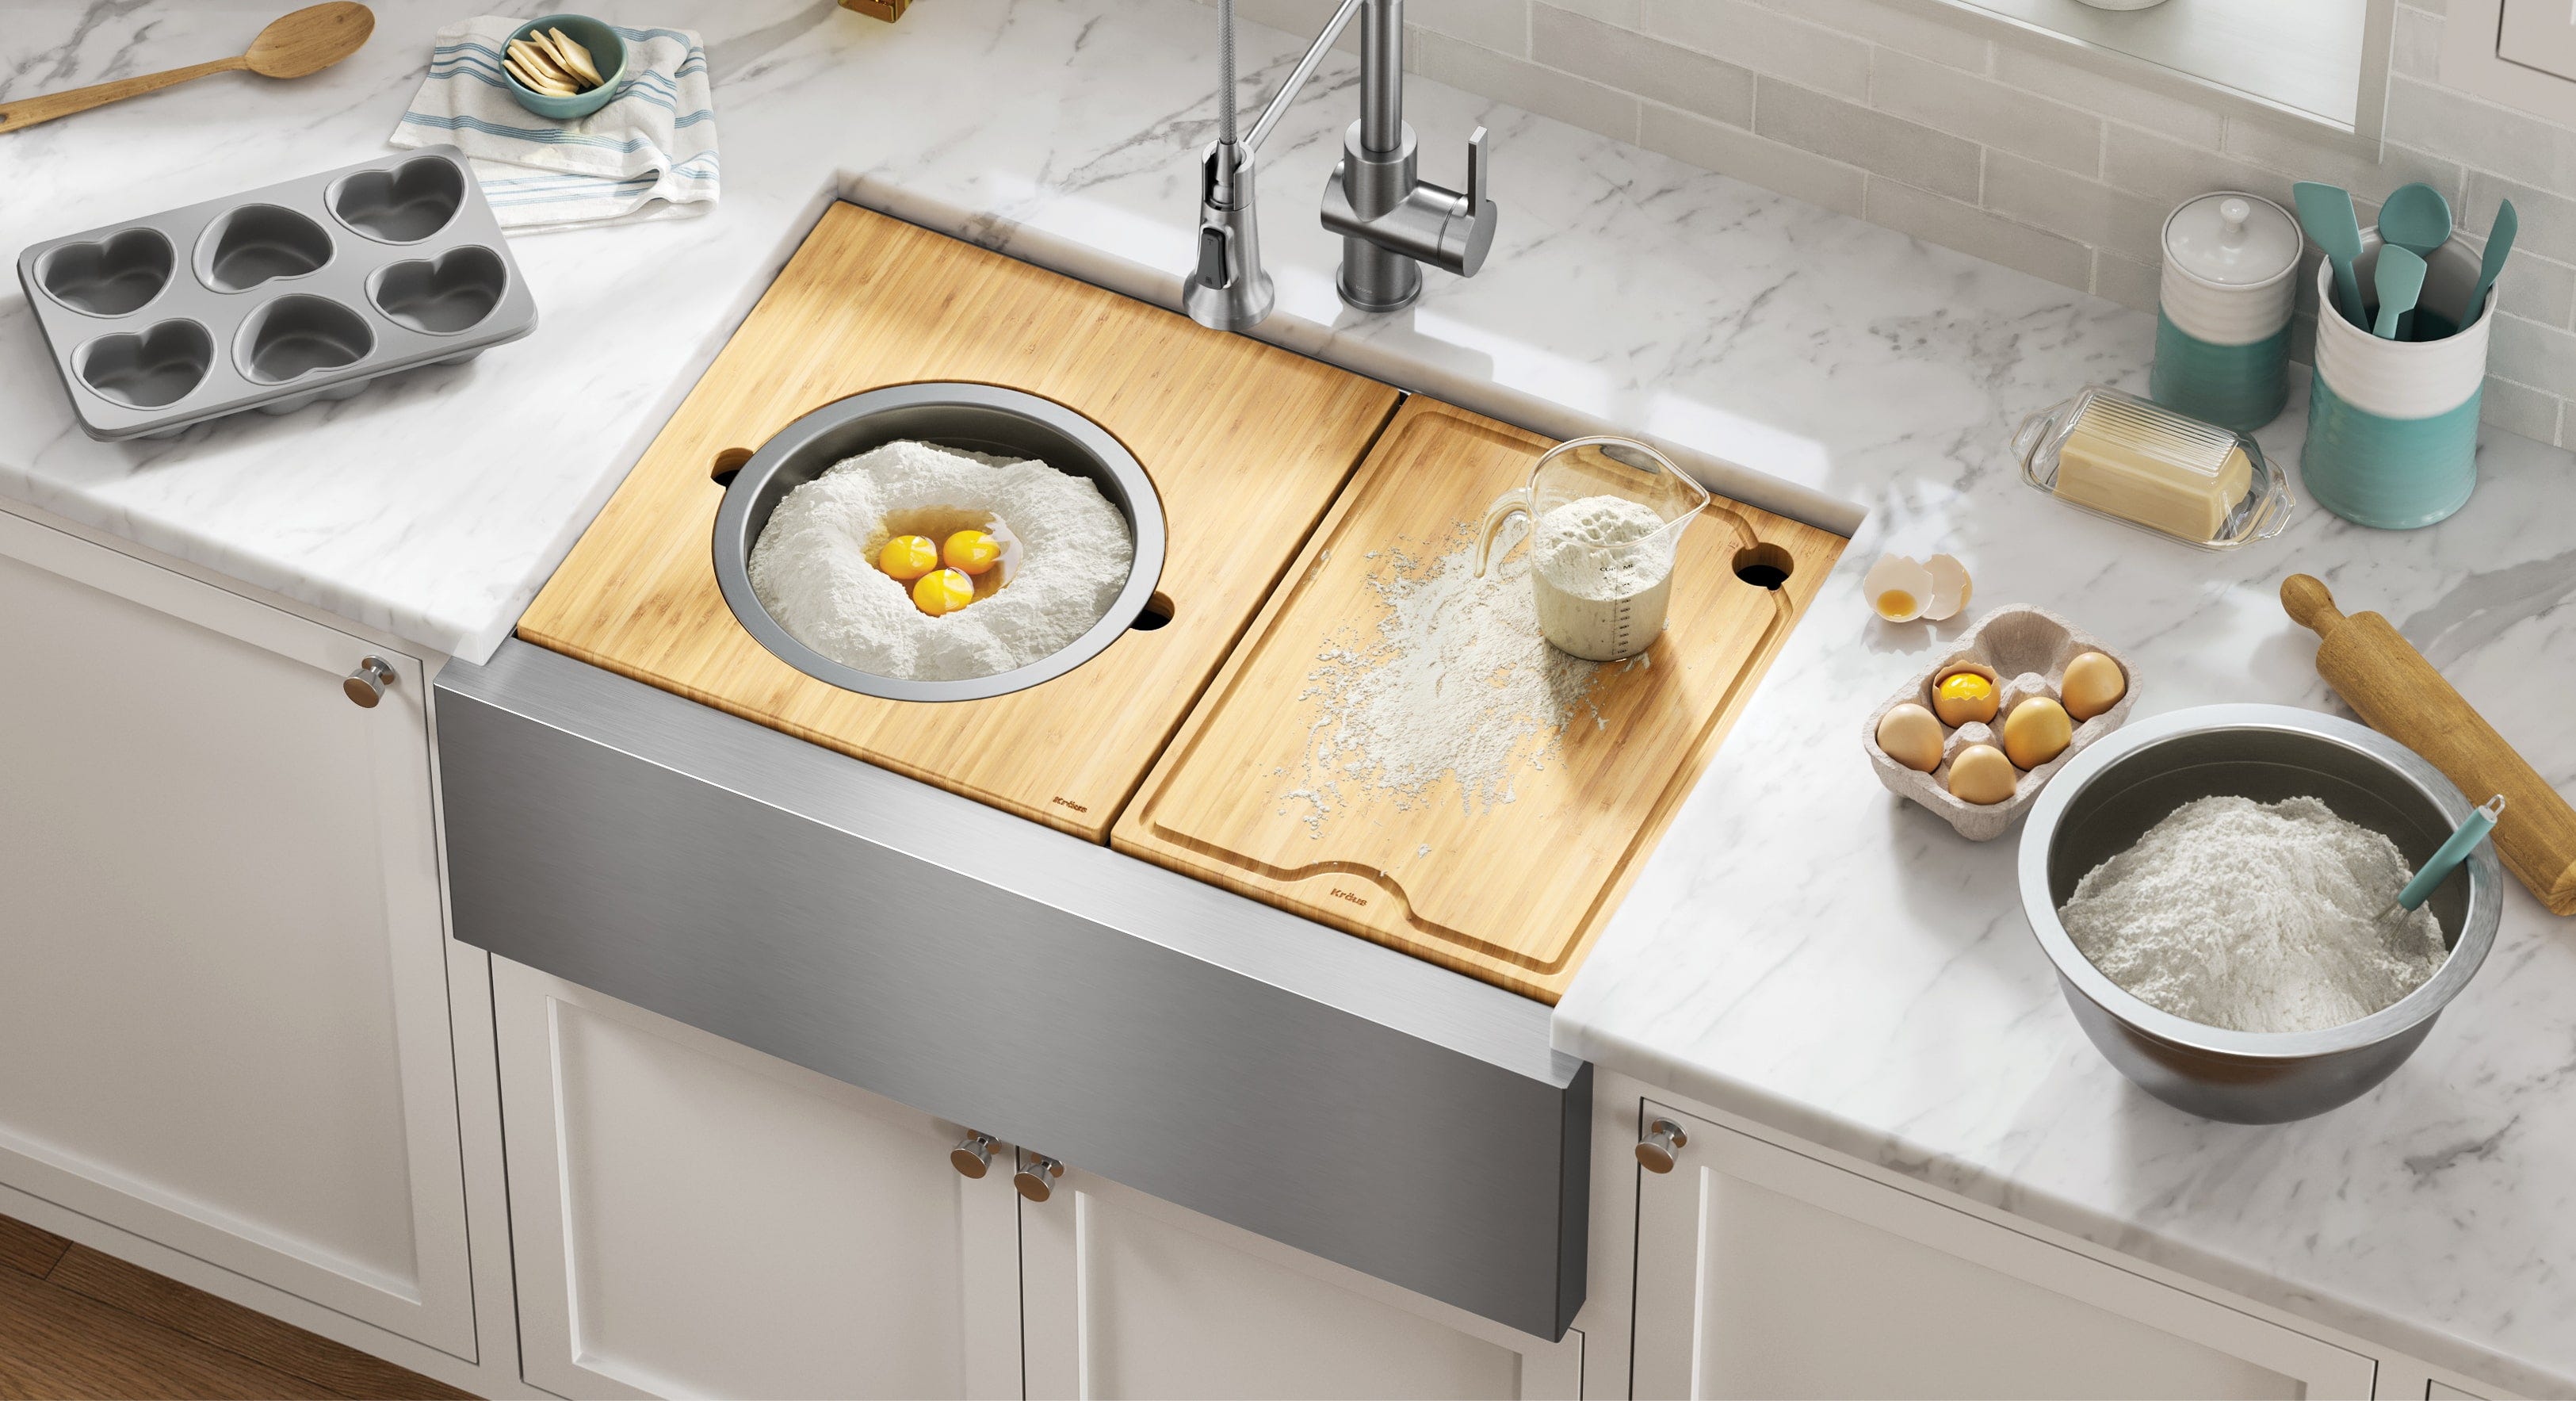
#5 Separating Pre-Measured Ingredients
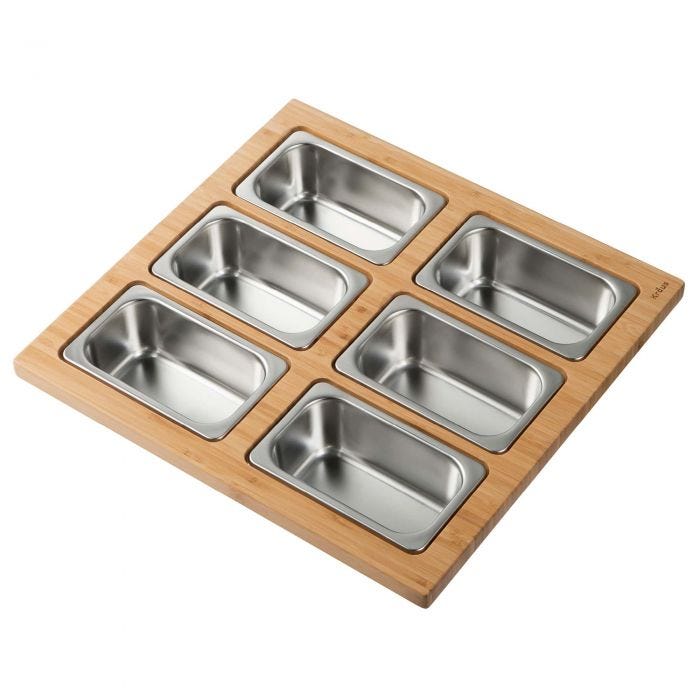
If you are baking or preparing a complicated meal, sometimes it is helpful to pre-measure ingredients so that you have them ready to go when it is time to add them to the dish. Measuring out your ingredients ahead of time helps to keep things organized and makes for a more enjoyable stress-free experience while cooking. Kraus® Workstation Serving Boards are always up to the task, with a space-saving design that allows you to stage the meal over the sink, freeing up valuable space on the kitchen counters.
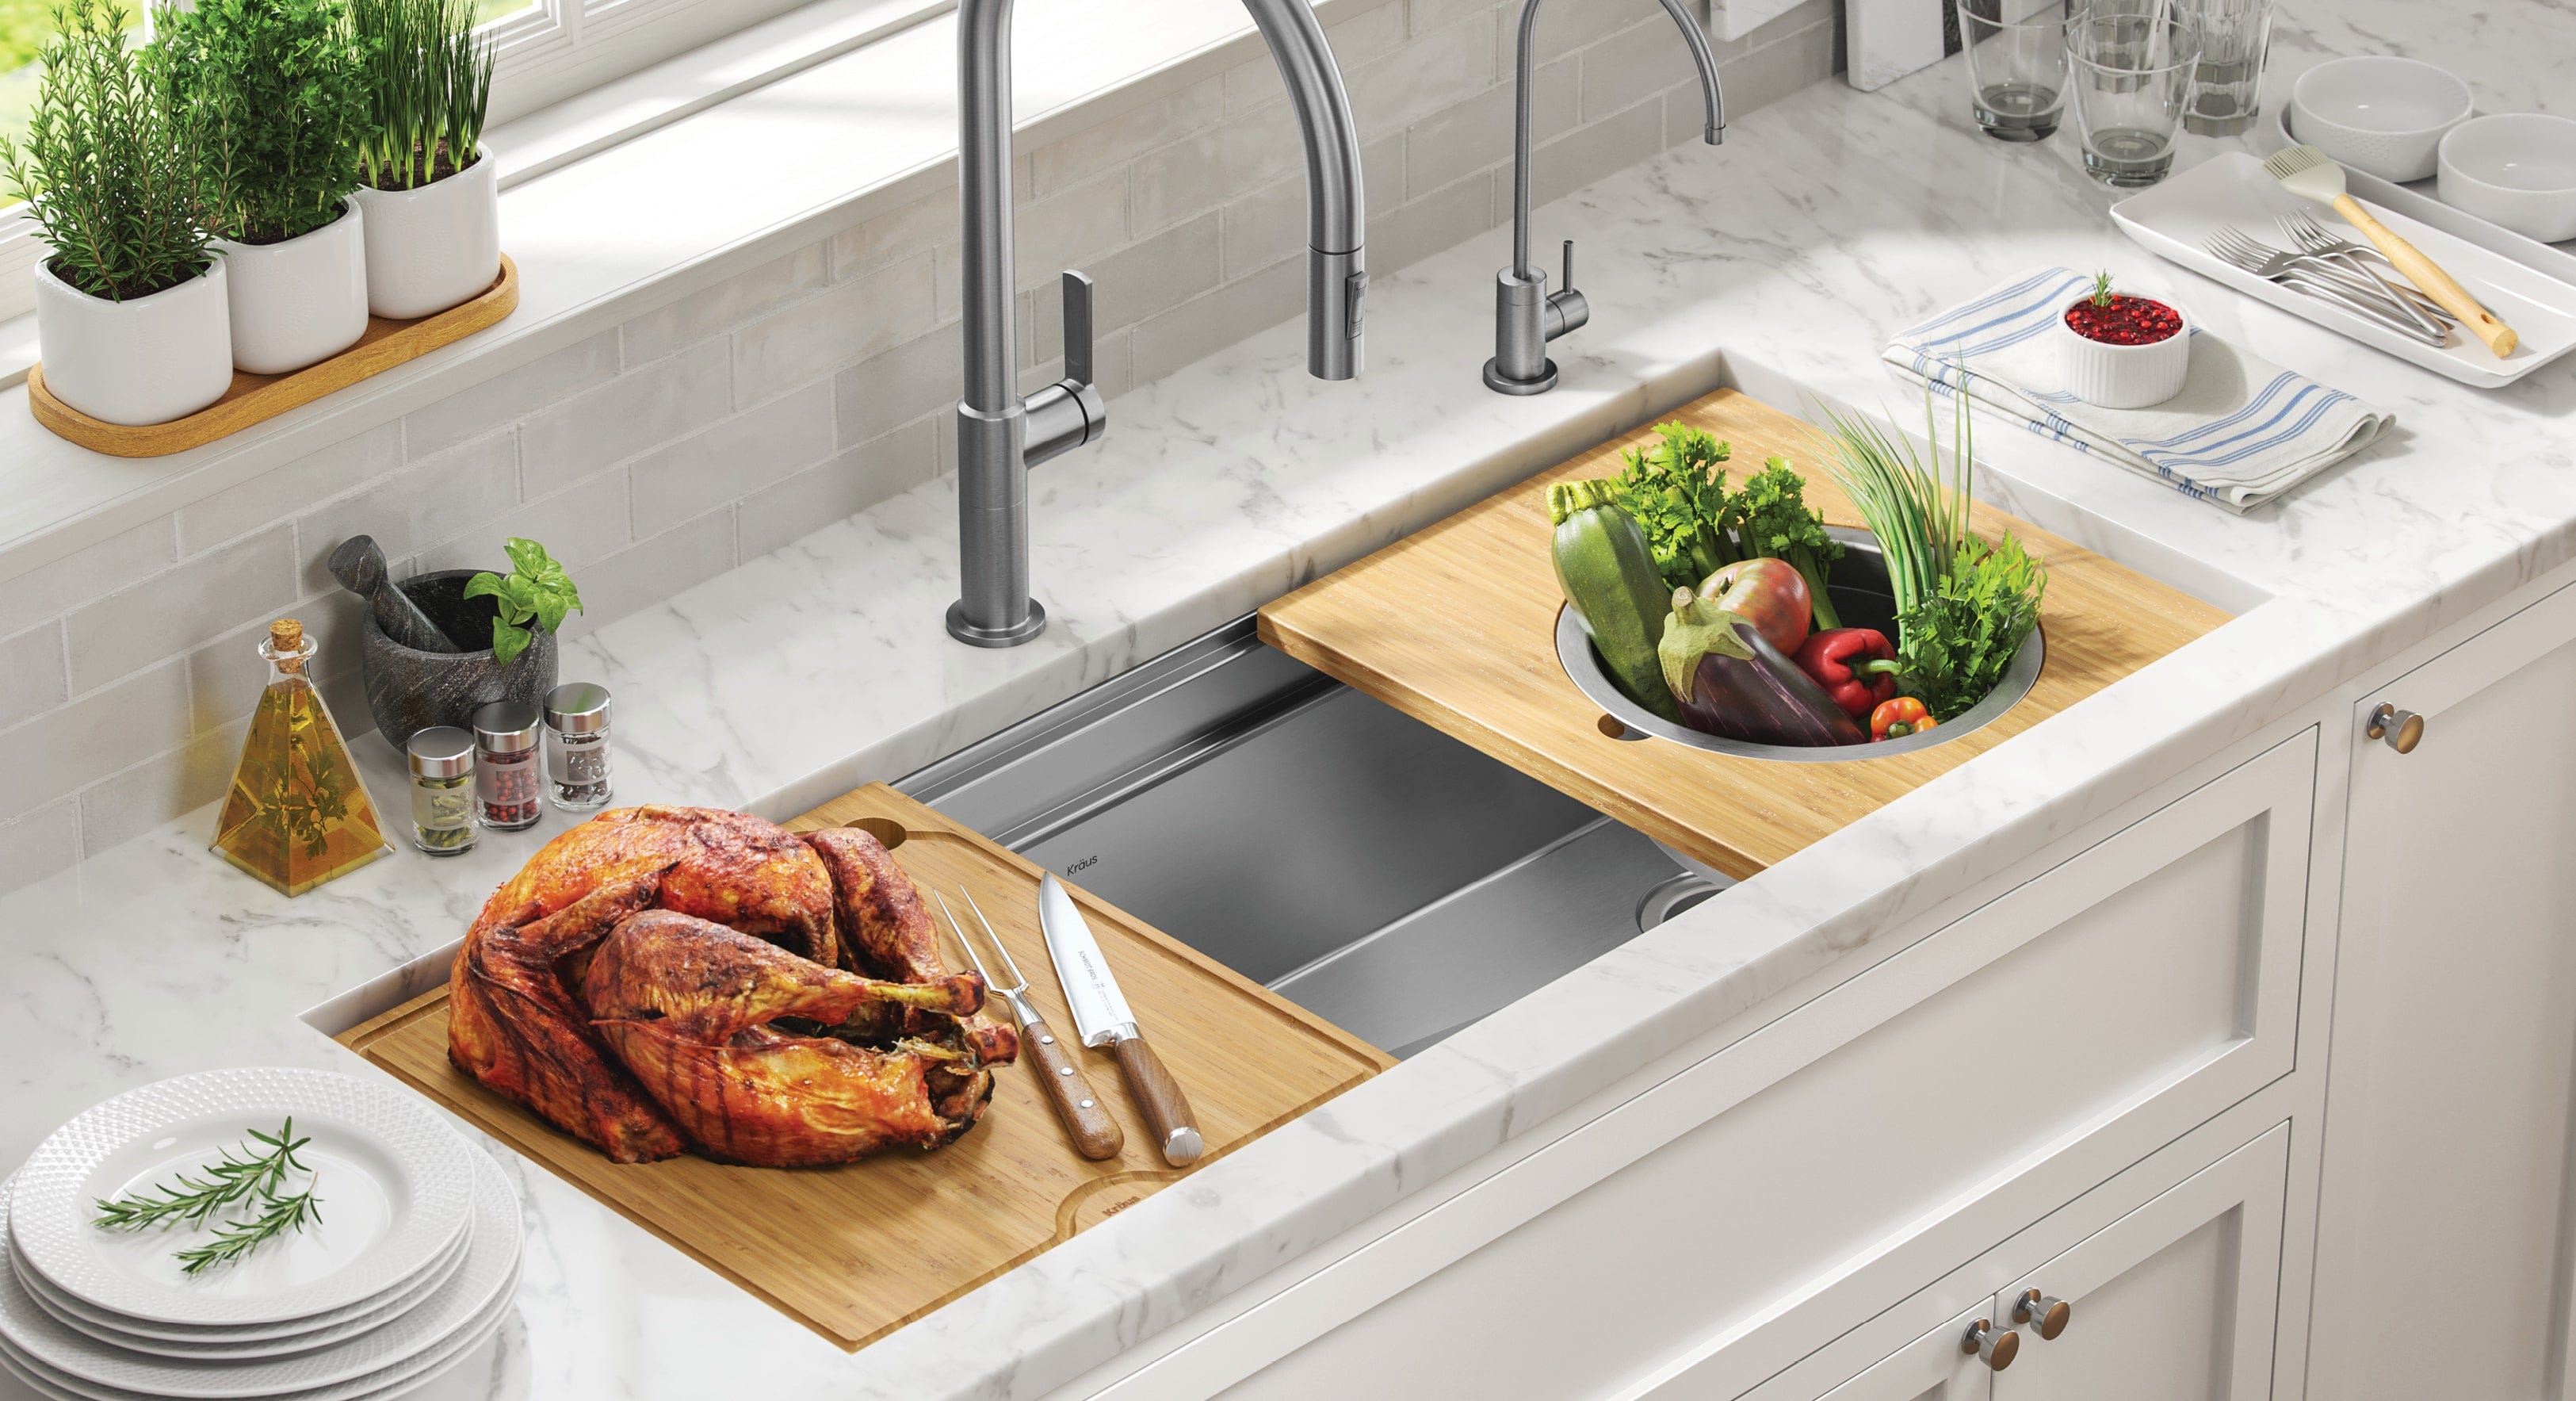
#6 Carving a Turkey
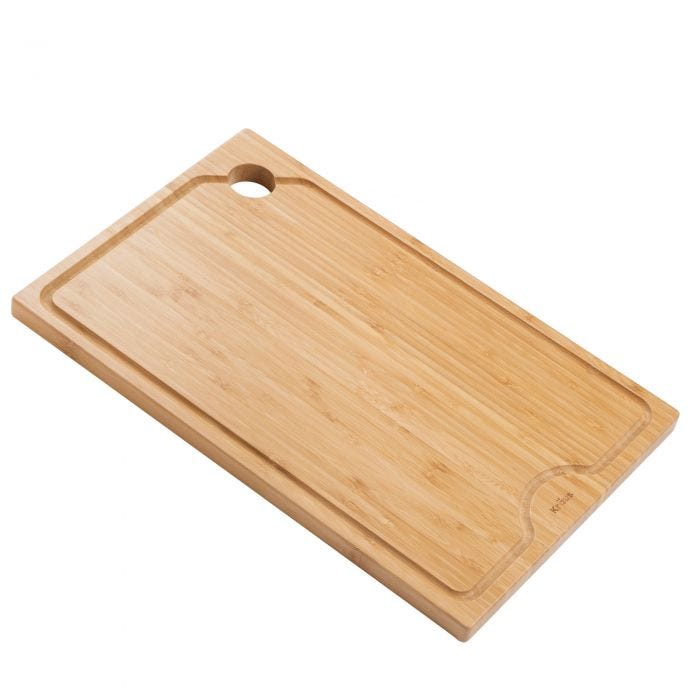
You’ve been cooking all day and it’s almost time to sit down at the dinner table... just as soon as you carve the turkey. This is where things usually get messy! But with Kraus® Workstation Cutting Boards, you can slice up a turkey or roast without having to scrub the kitchen counter afterward. Built-in drainage grooves in the cutting board are designed to catch liquids. But if any of the juices do spill over, they’ll just go right down the drain, thanks to the optimized over-the-sink design.
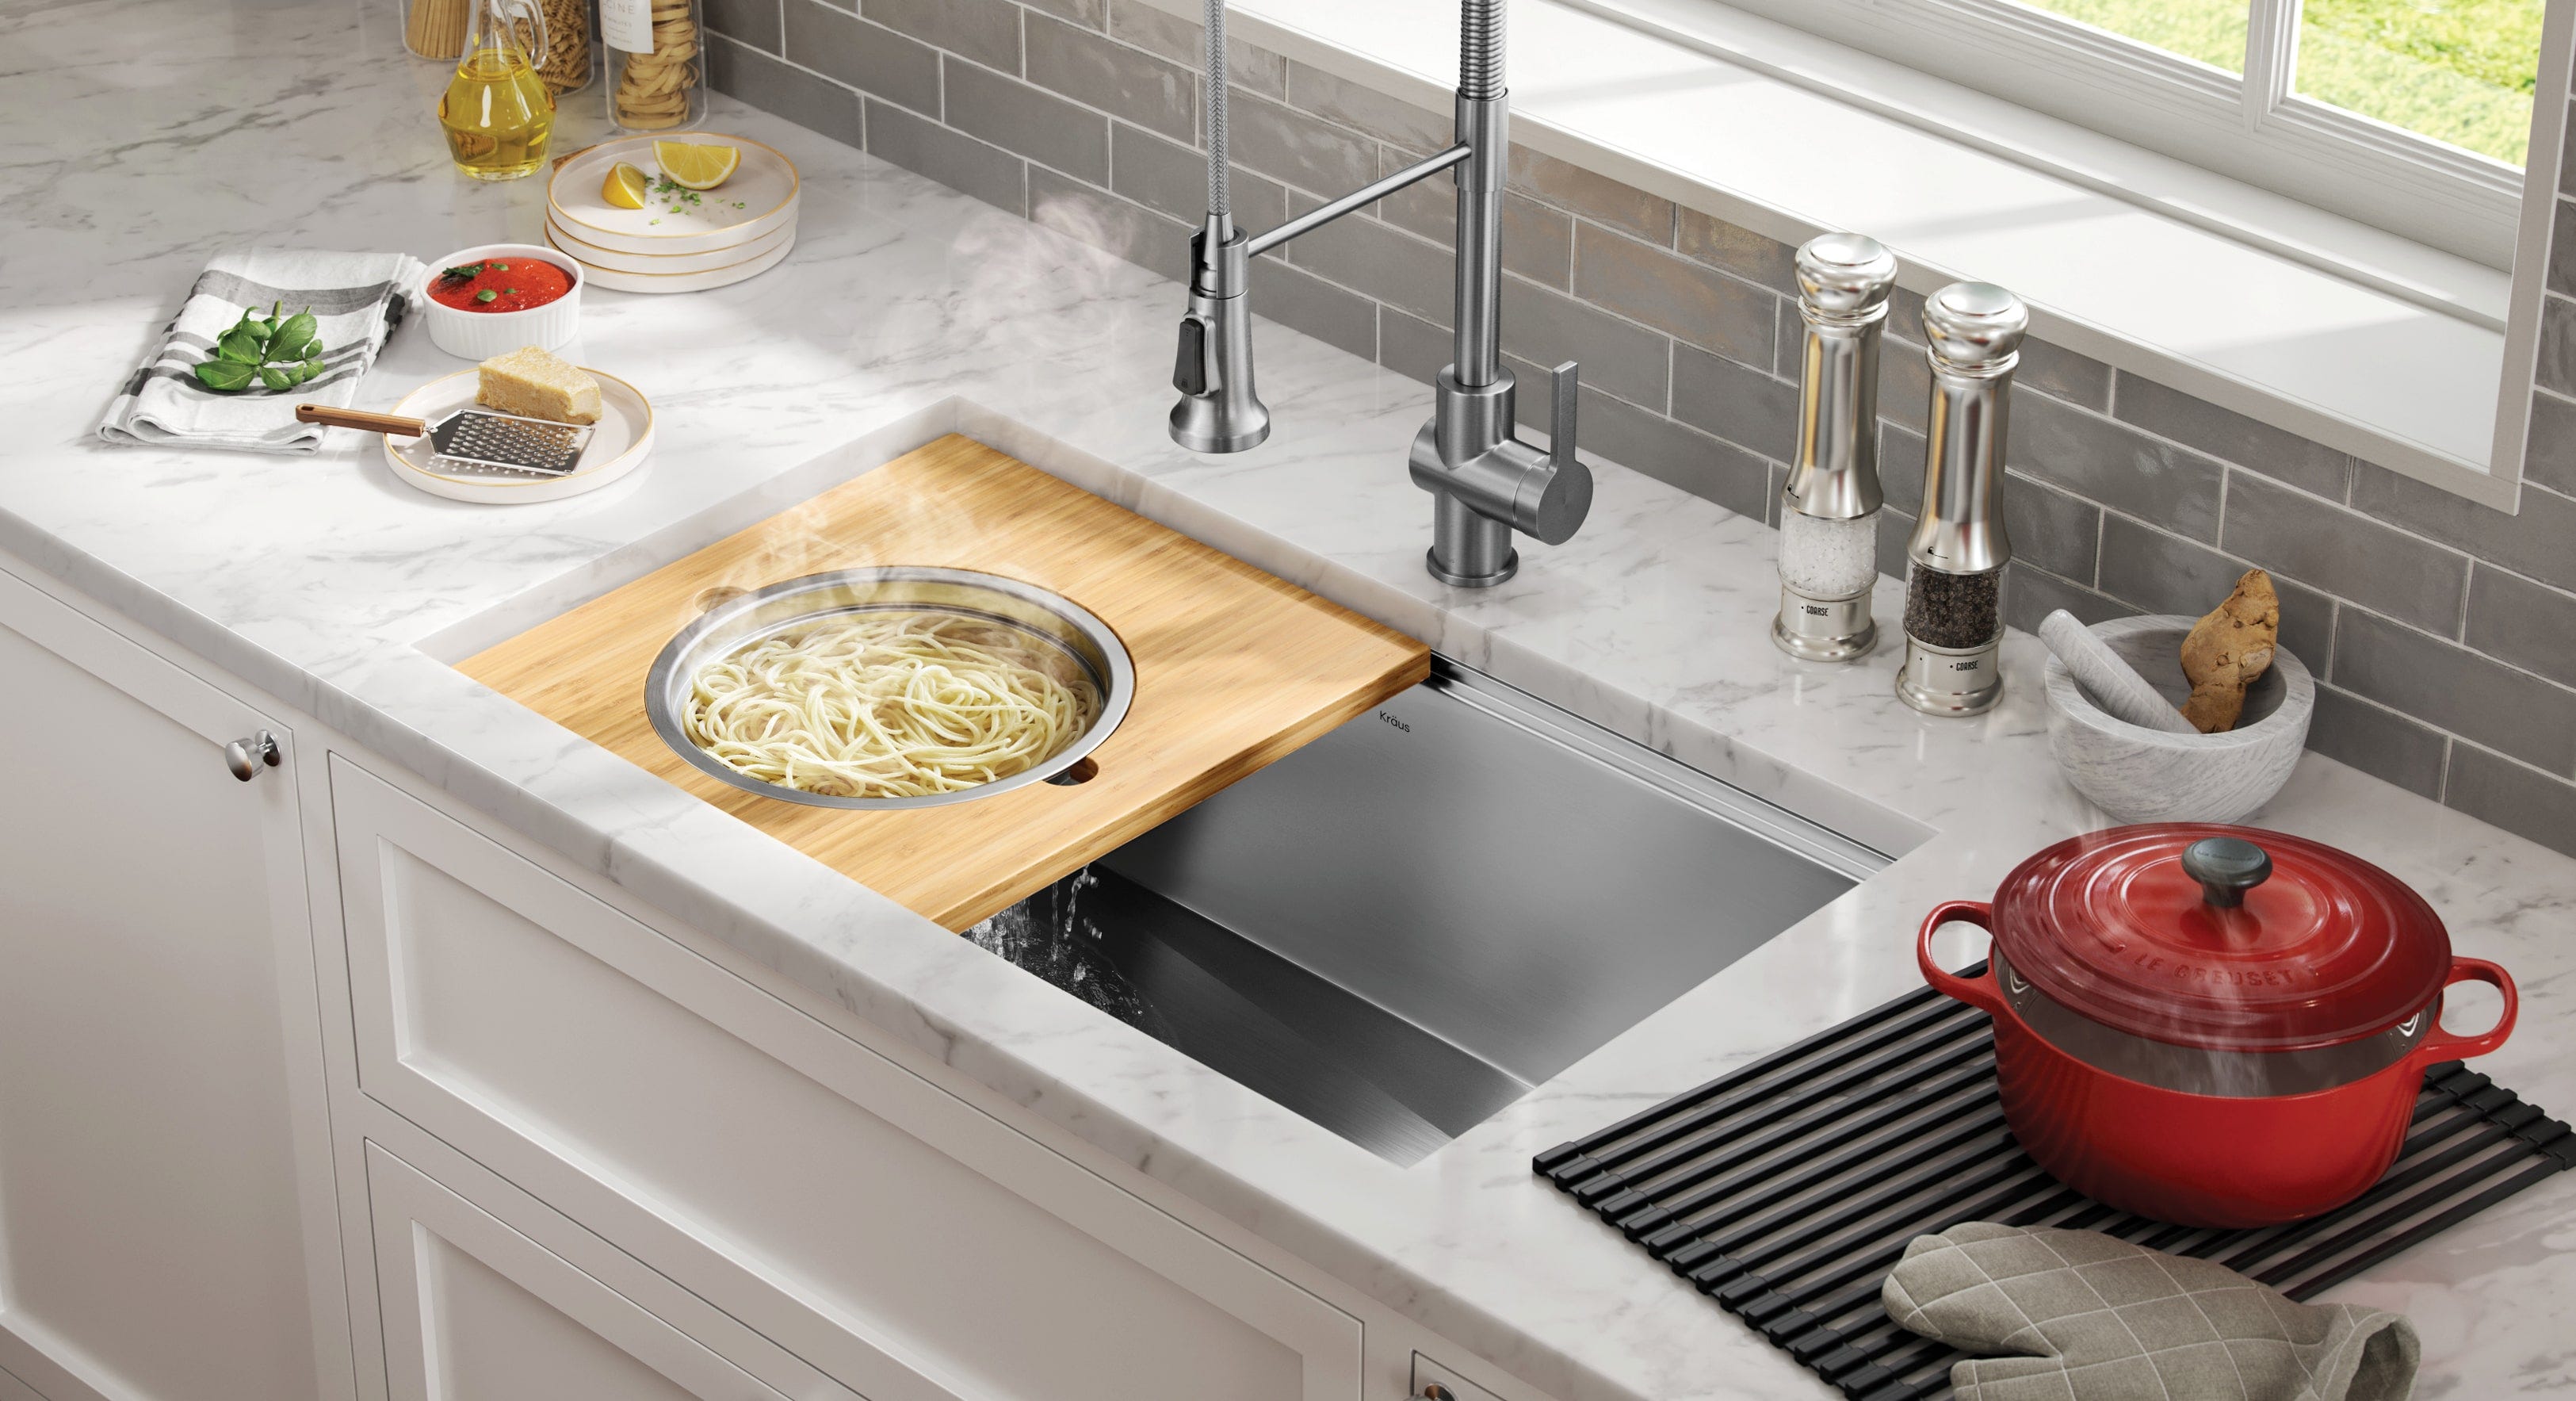
#7 Straining Pasta
Who else remembers the job of holding the colander as mom poured boiling hot pasta water between your hands in a rising cloud of steam? Even though nobody got hurt (most of the time), the ordeal might have turned spaghetti night into a rather harrowing experience.
Fear no more! Kraus® Workstation Colanders allow you to keep those hands out of harm’s way when straining pasta. Better yet, it turns this task into an easy one-person job as the colander and accessory board sit securely on the workstation ledge.
#8 Creating the Perfect Buffet Station
Taco night, anyone? Kore™ Workstations make the perfect buffet station for build-your-own style meals with multiple ingredients, such as tacos and salad bars. It also creates an ideal party-ready serving station for drinks and appetizers. Simply prepare the fixings and place them in their individual serving bowls. Then belly up to the buffet!
#9 Mixing Ingredients
Do you have a baker in your family? If so, you are probably used to walking into the kitchen and seeing flour everywhere!!! The Kraus® Workstation Mixing Bowl alleviates your bread-making woes by letting you mix your ingredients right over the sink. Then, easily move over to yourWorkstation Cutting Board which provides a perfect surface for kneading dough.
Kraus Video
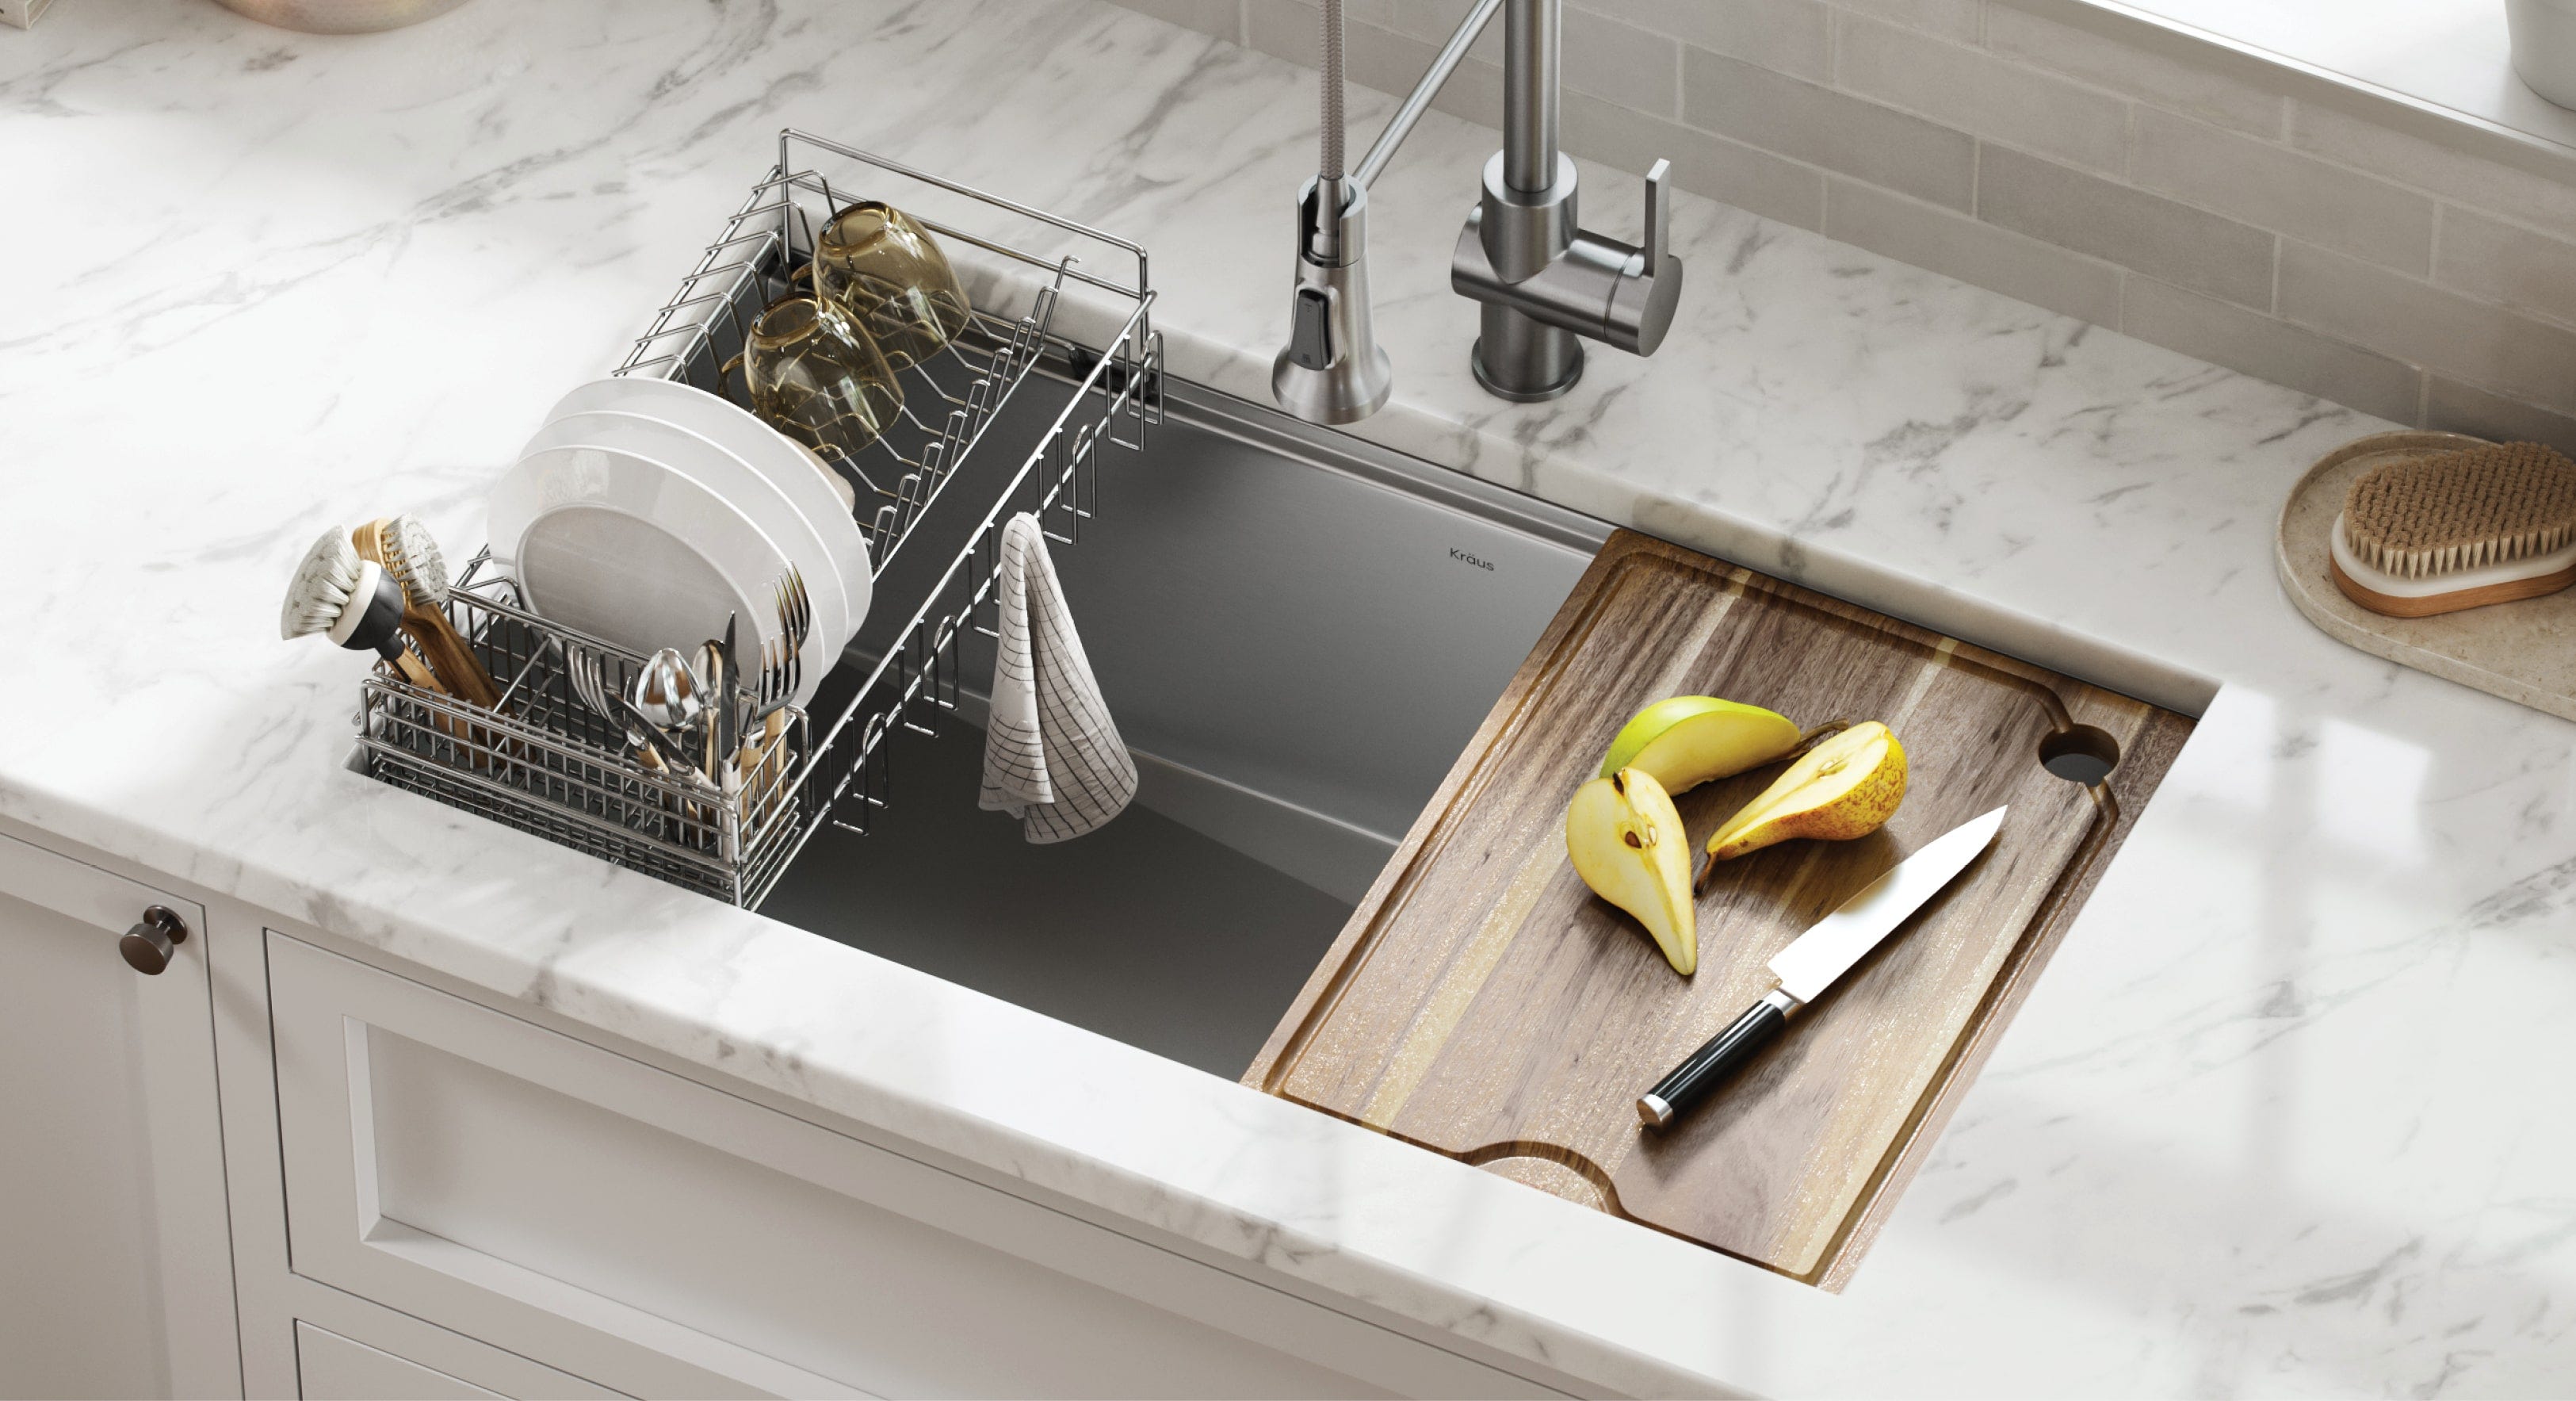
#10 Drying Dishes
After all is said and done, it’s time to tackle the dishes! Nobody likes cleaning up after a meal, but the Kraus® Workstation design makes even this kitchen task a little easier. All Kraus® Workstations are made with generous dimensions to give you more room for washing large items like baking sheets or stacks of dishes. Workstation Dish Drying Racks allow you to rinse and dry dishes right over the sink, eliminating pools of water on your kitchen counters which can make a mess, and might even cause damage to your base cabinets. There are several different models available to meet your needs, including options with a removable cutlery holder.
Kraus® Workstations offer a flexible solution for a wide variety of kitchen tasks, allowing you to customize your sink experience based on your needs. Available in multiple sizes, materials, and mounting types, there are dozens of options for every style. No matter what you are cooking lately, Kraus® Workstation sinks are the perfect way to enhance the way you work in your kitchen.